

この記事には広告が含まれています。
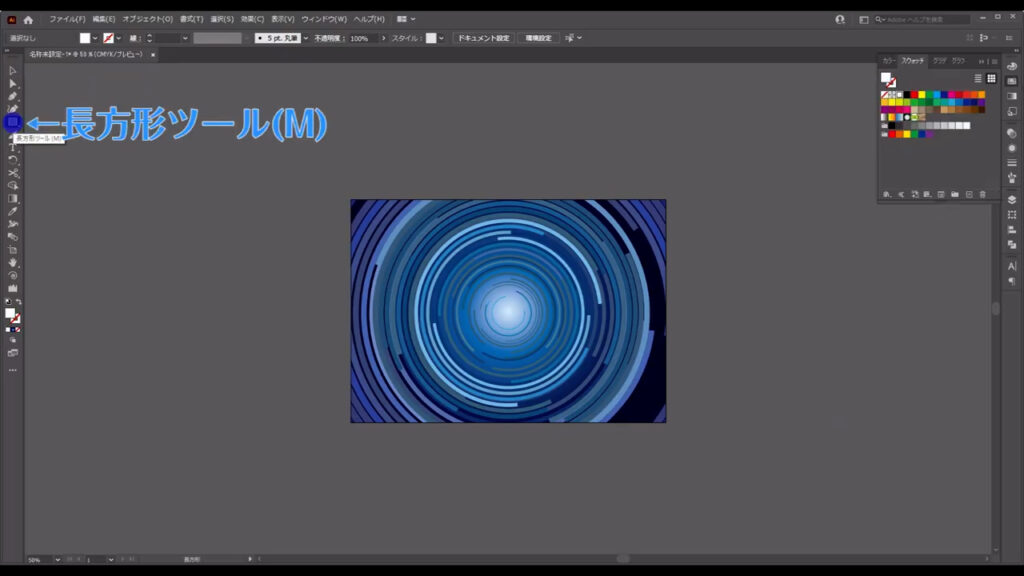
こんにちは、イラレ常人です。
今回は、ゲームタイトルのバックとかに使えそうなサイバーな背景を作っていきます。
無料で完成素材をダウンロード↓
サイバー背景イラスト – No: 22036753/無料イラストなら「イラストAC」をイラストACでチェック!
それでは、さっそく本編にいきましょう。
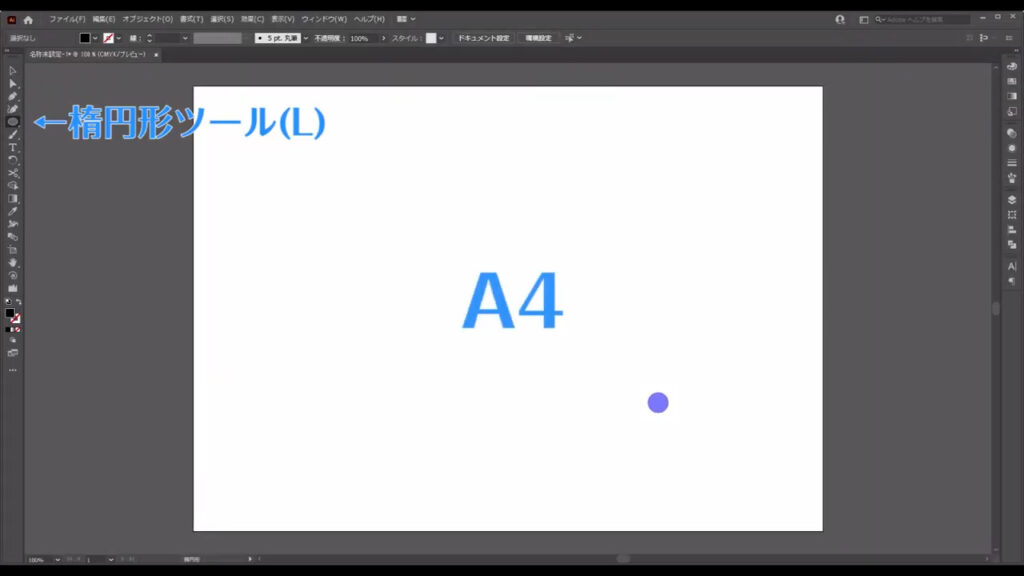
背景の素を作る
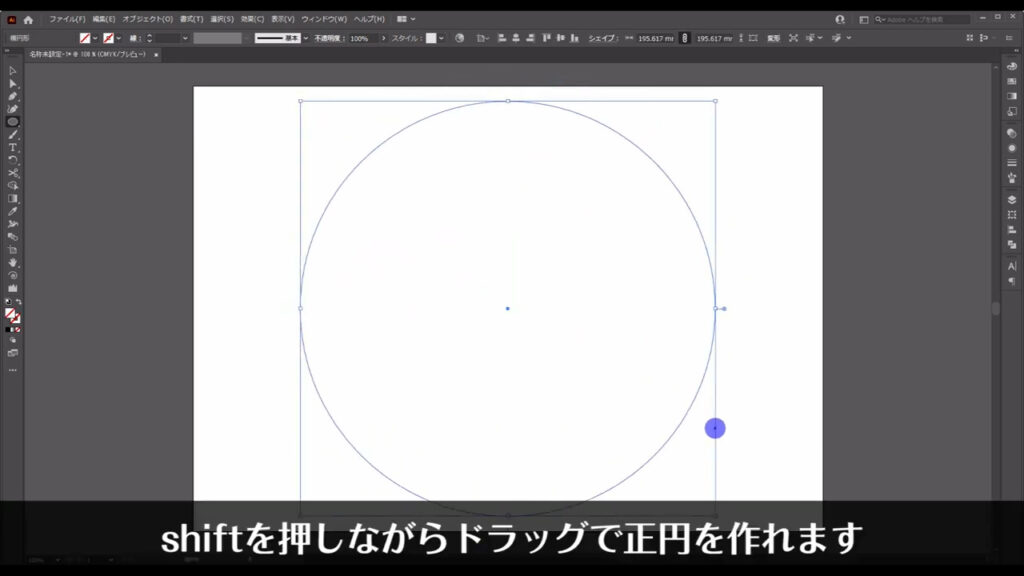
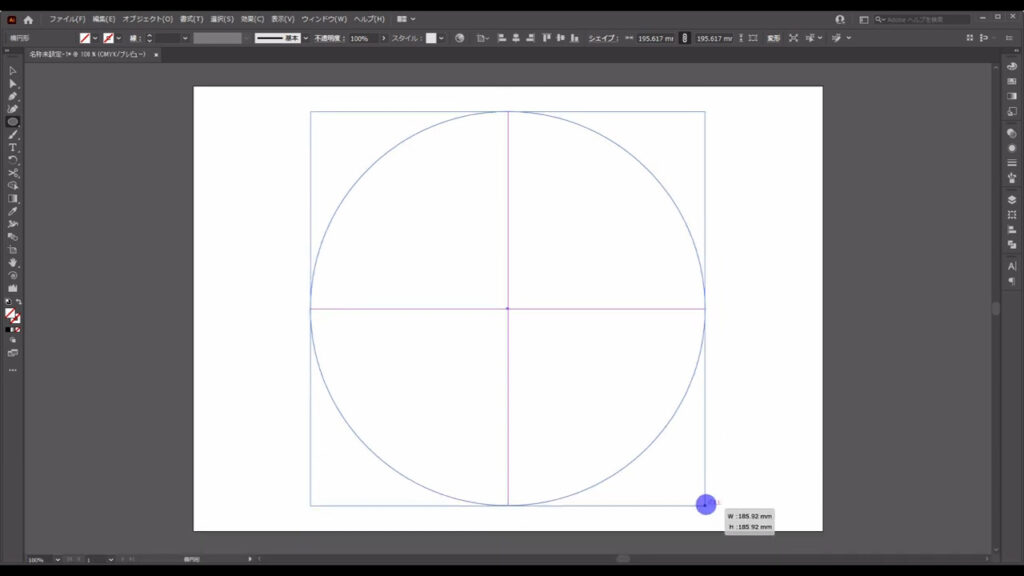
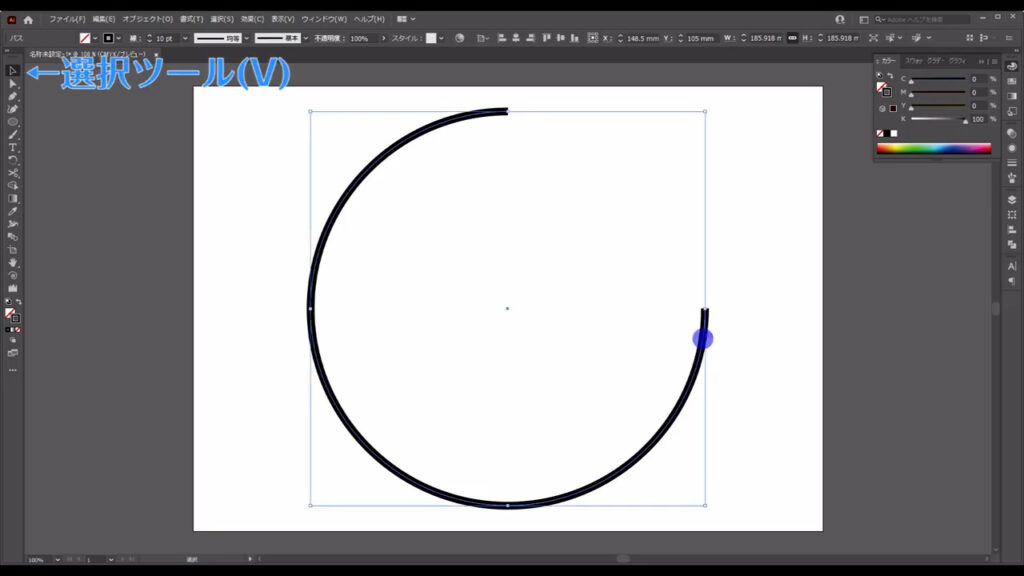
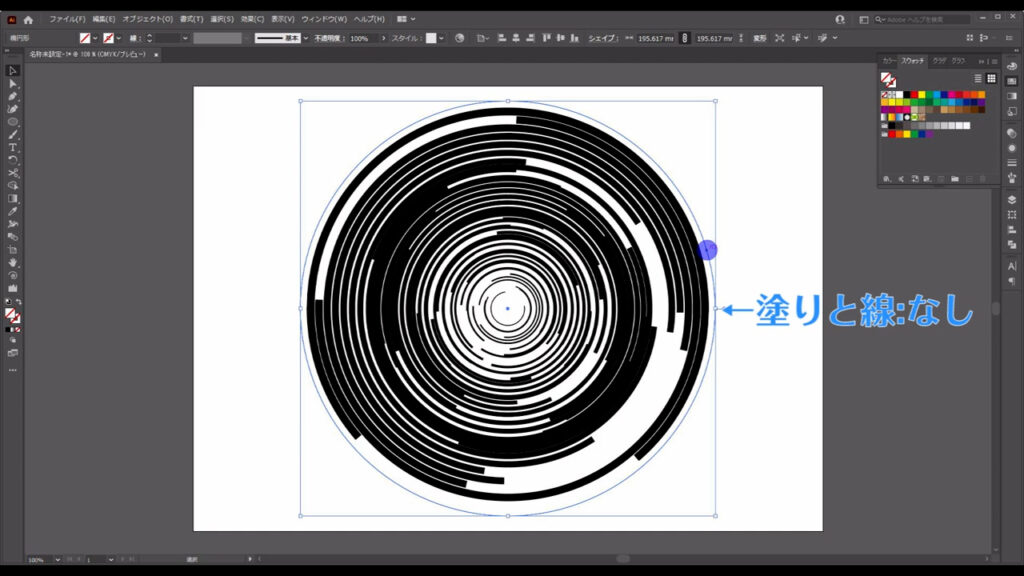
まず楕円形ツールに切り換え、shiftを押しながらドラッグで正円を作ります。
塗りと線はなしです。
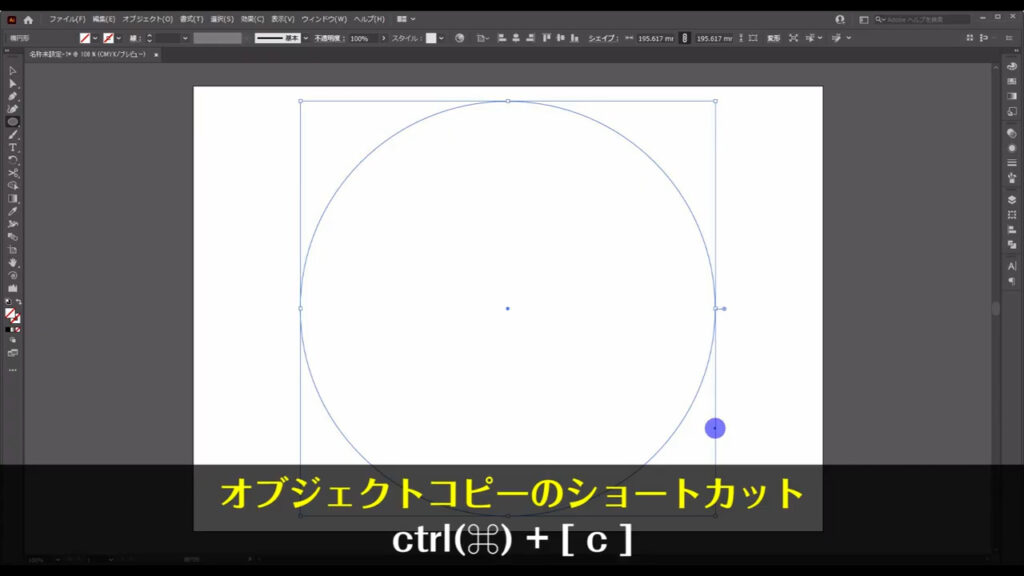
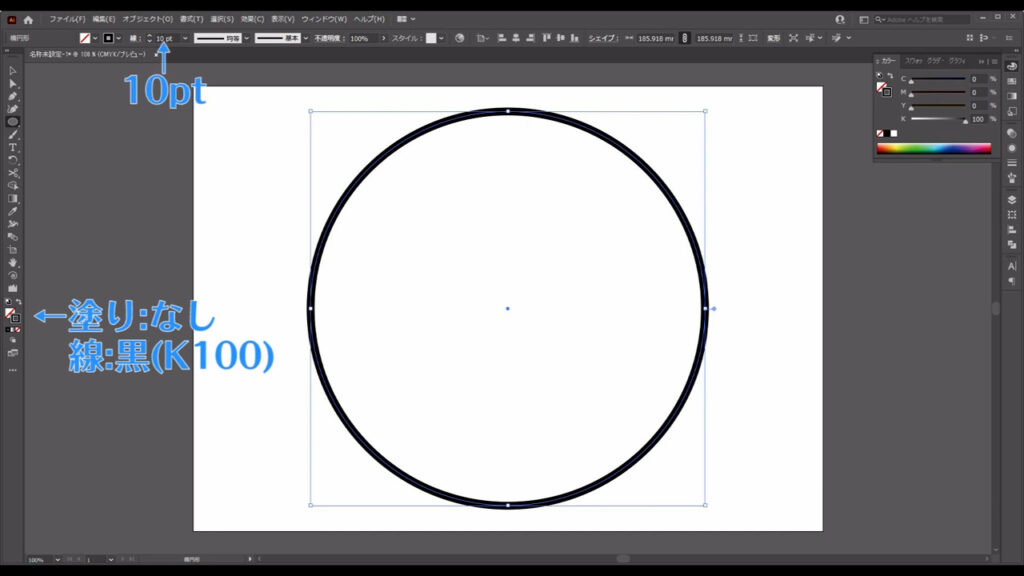
そうしたら選択ツールに切り換え、この正円をctrl(⌘) + [ c ]でコピーします。
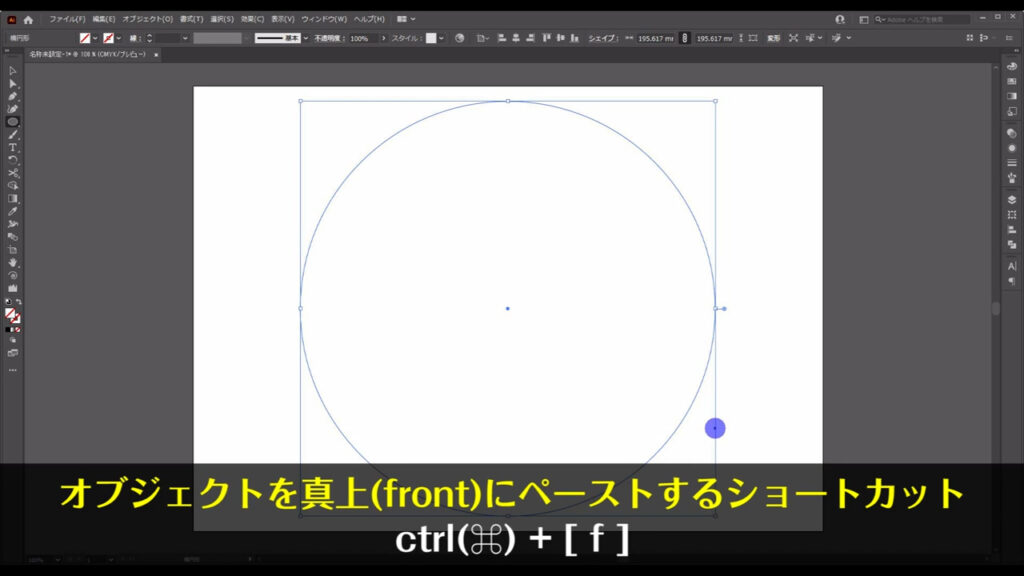
さらにctrl(⌘) + [ f ]で真上にペーストします。
そして、コピーした方の正円を下図のように少し小さくします。
円の中心を軸としたサイズ変更はshiftとalt(option)を同時押ししながら、ドラッグでできます。
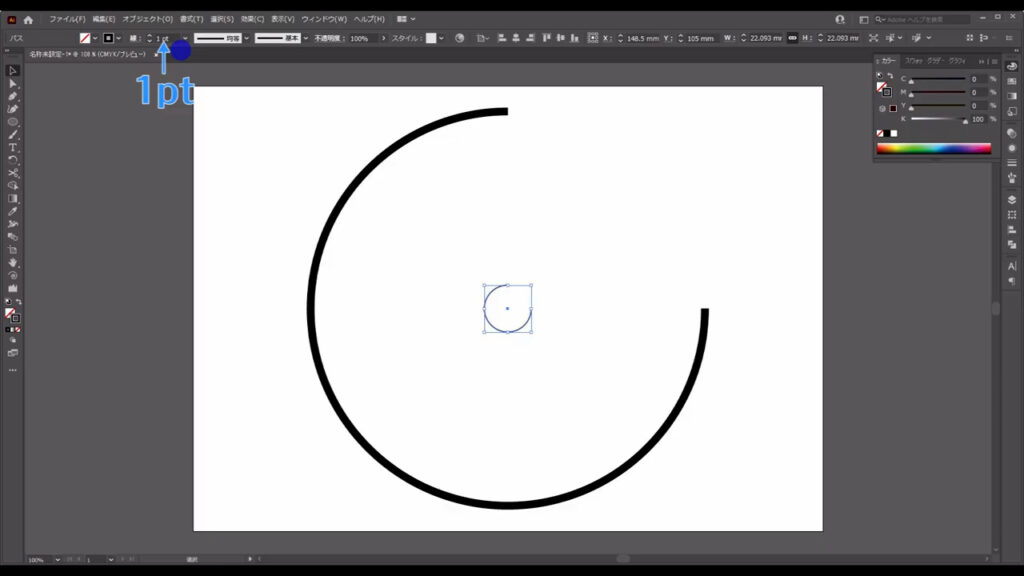
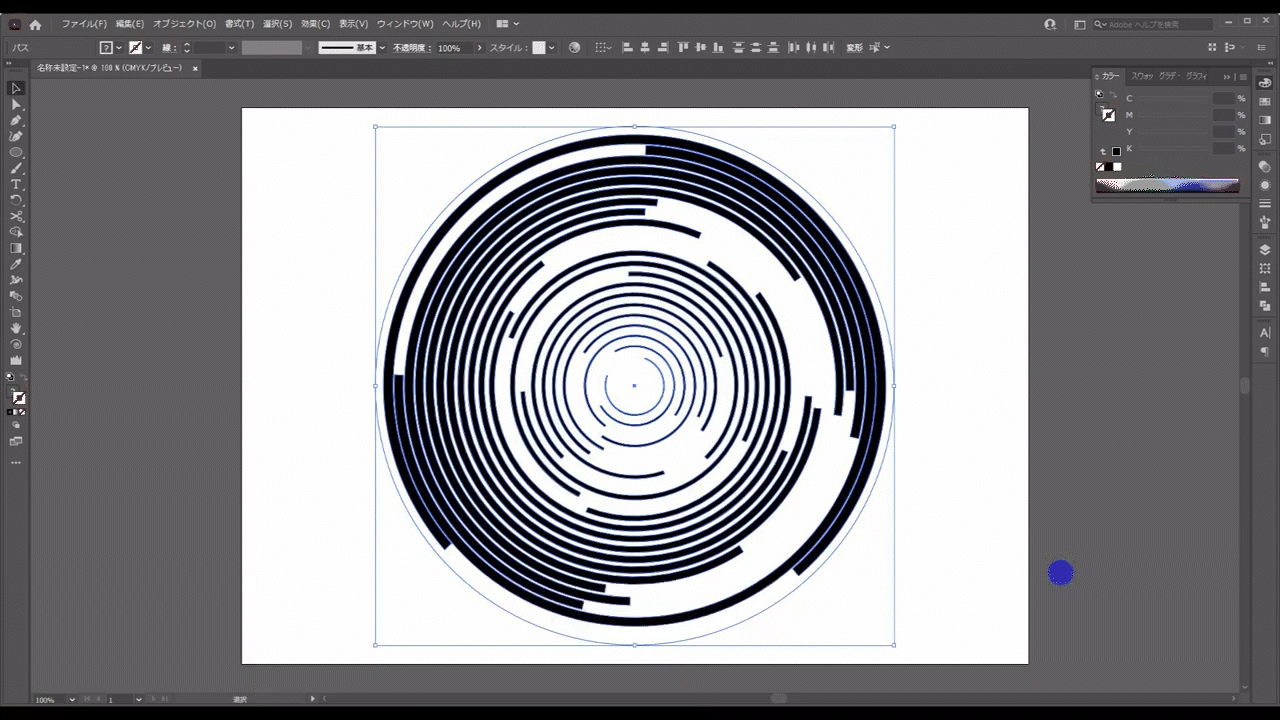
こちらの線の色はとりあえず黒にしておきます。太さは10ptにします。
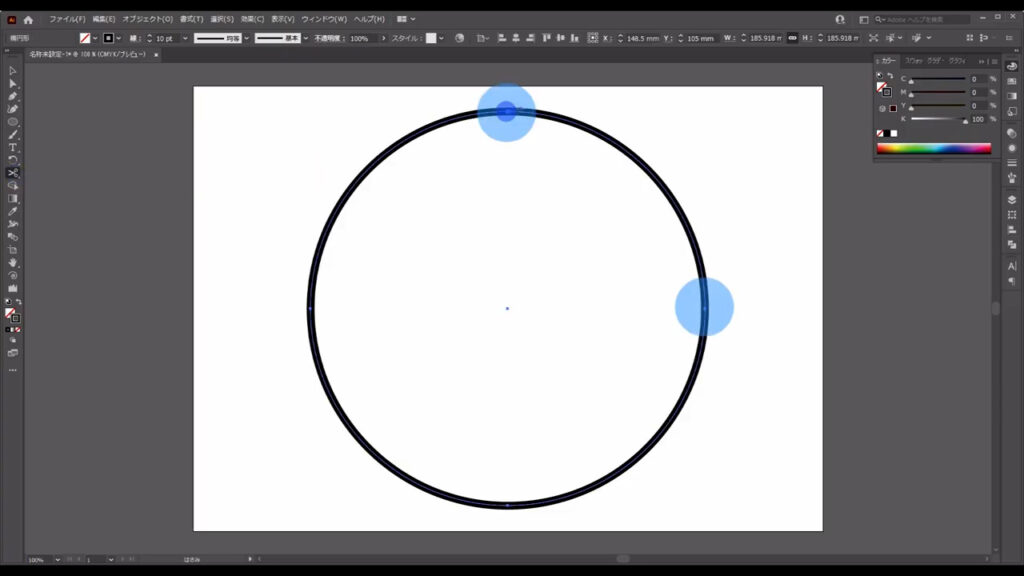
そうしたら「はさみツール」に切り換え、マーキング部分のアンカーポイントでパスを切ります。
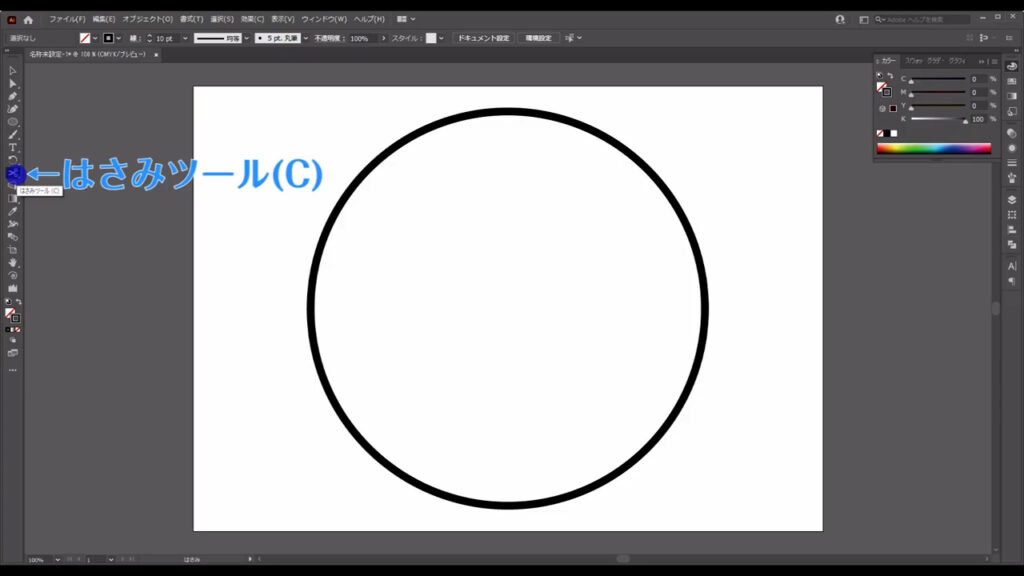
そして、短い方のパスは削除します。

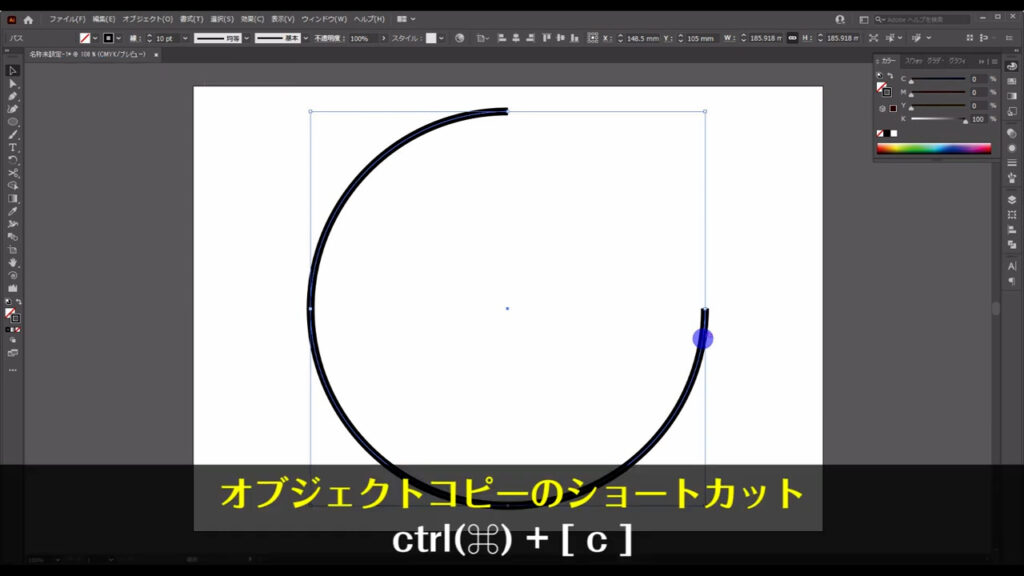
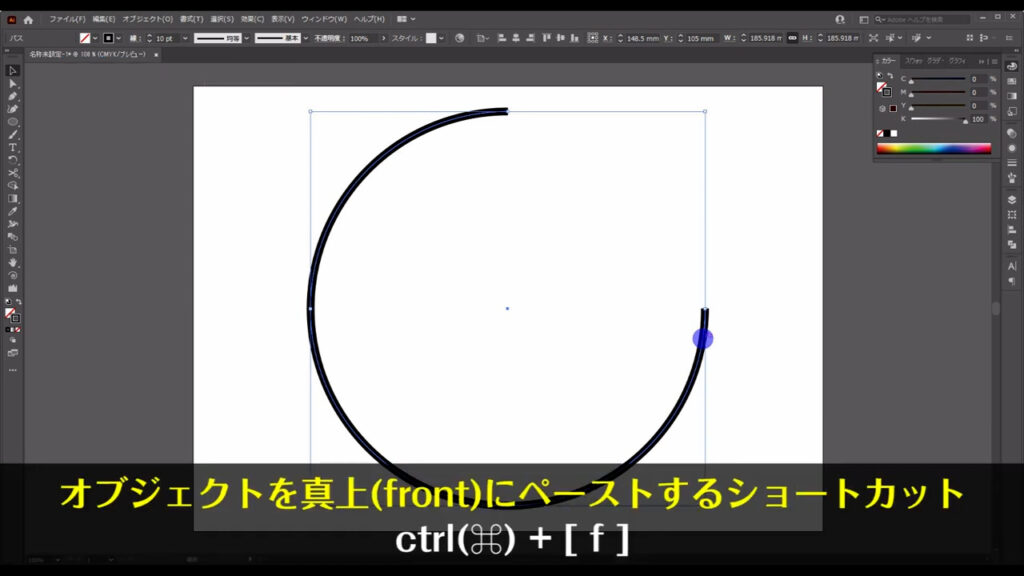
それが終わったら選択ツールに切り換え、今切ったパスをctrl(⌘) + [ c ]でコピー、さらにctrl(⌘) + [ f ]で真上にペーストします。
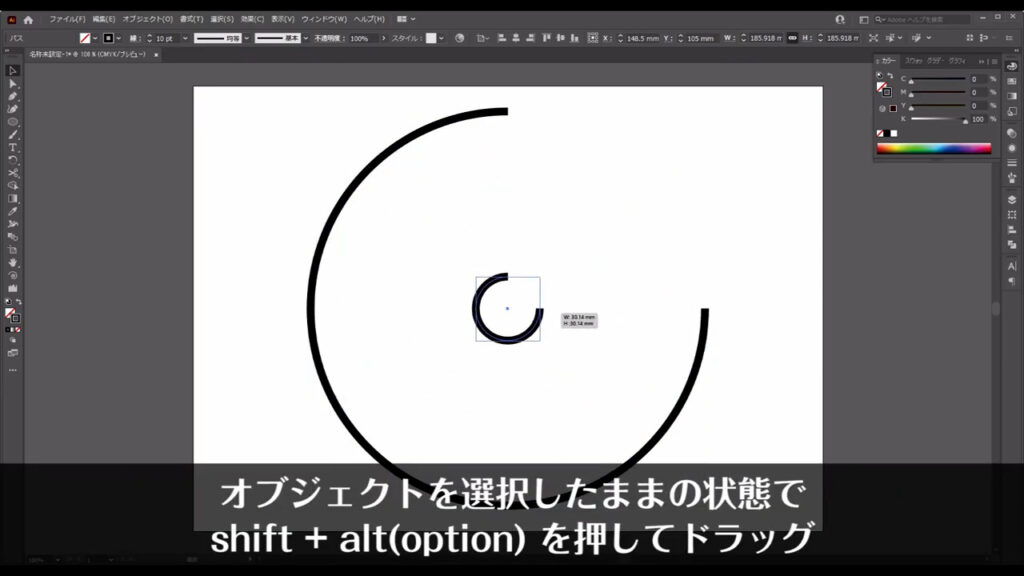
コピーしたパスはshiftとalt(option)を同時押ししながら、ドラッグで下図のように小さくします。
太さは1ptにします。
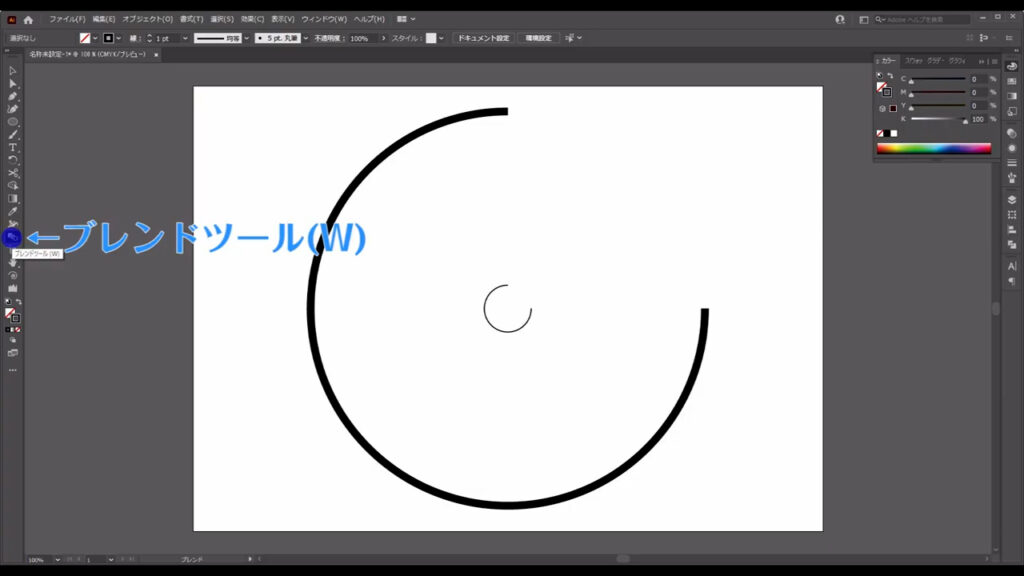
背景の素にブレンドをかけてランダム回転させる
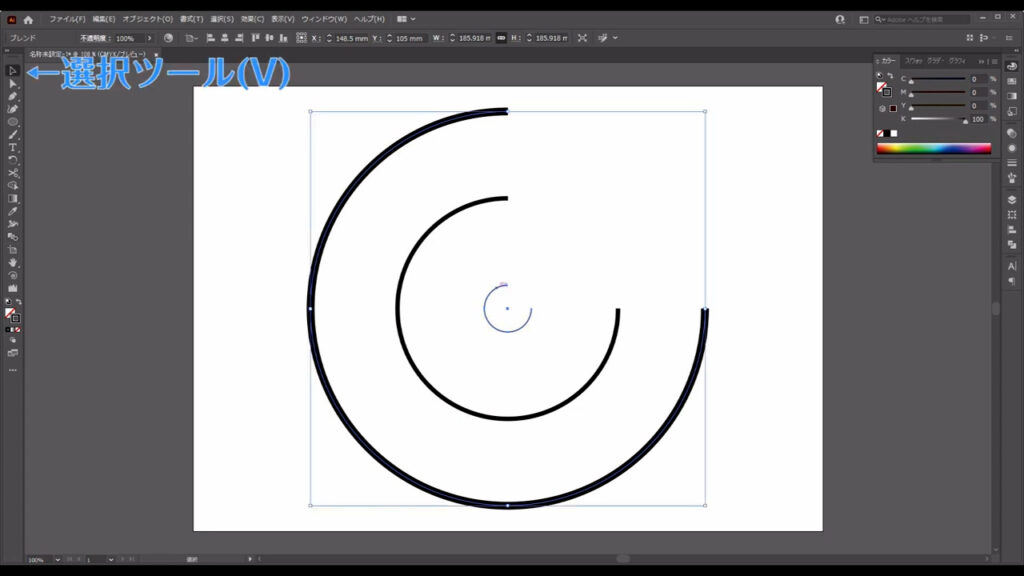
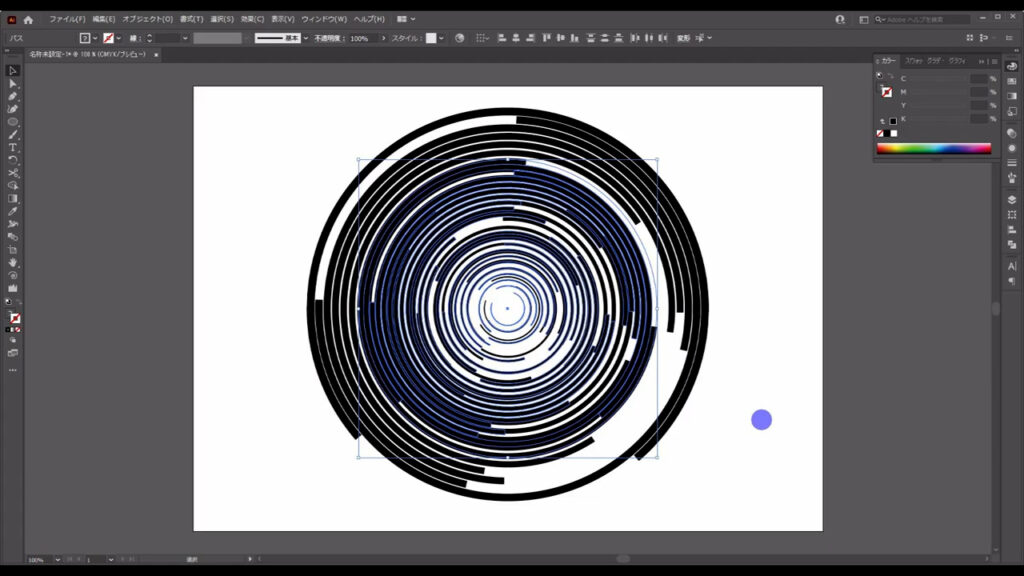
ここまで来たら、この2つのパスでブレンドをかけます。
ブレンドツールに切り換え、2つのパスを左クリックします。
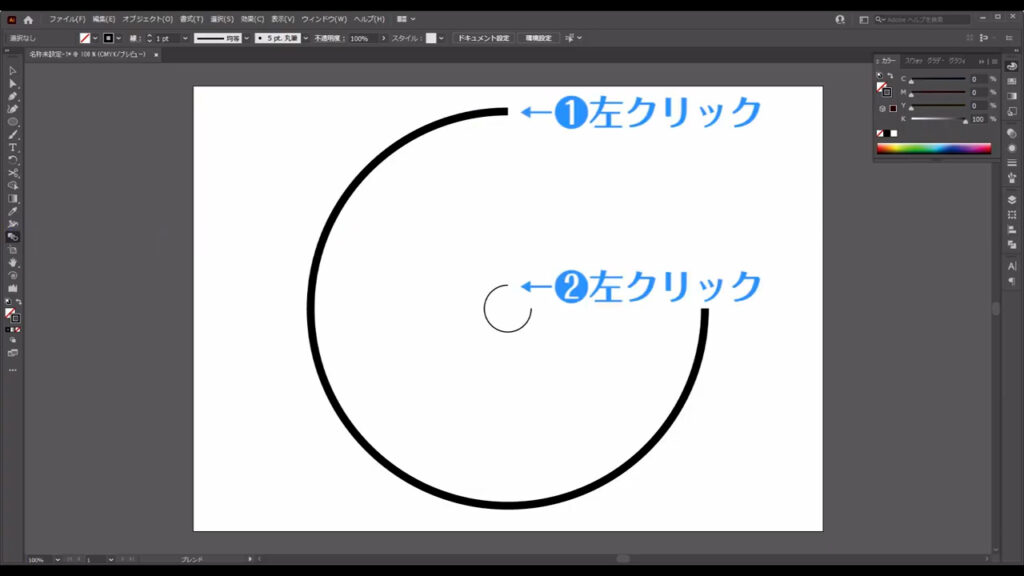
すると、間にもう1本新たなパスが出てきました。
これでは足りないので、中間のパスをもっと増やします。
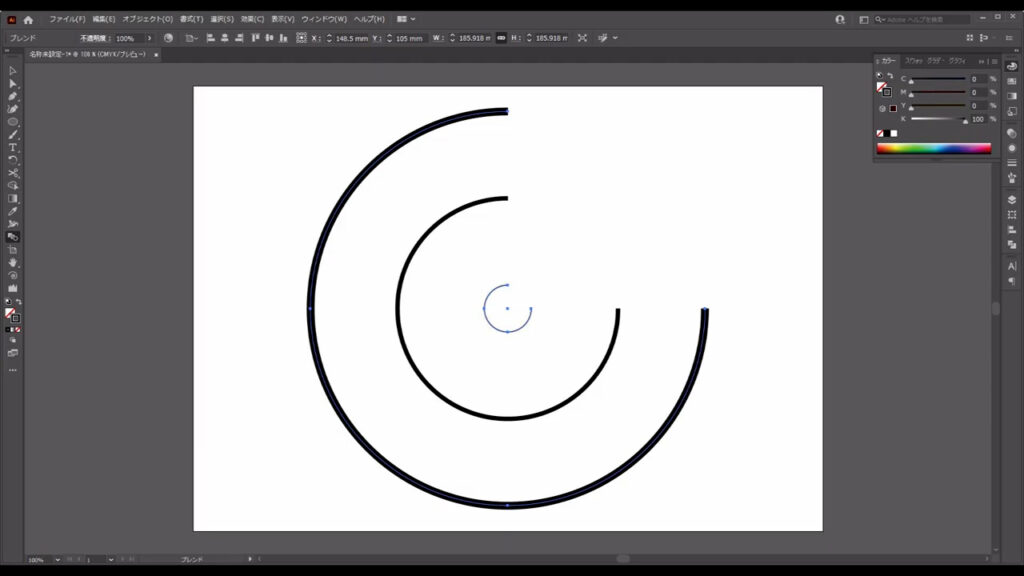
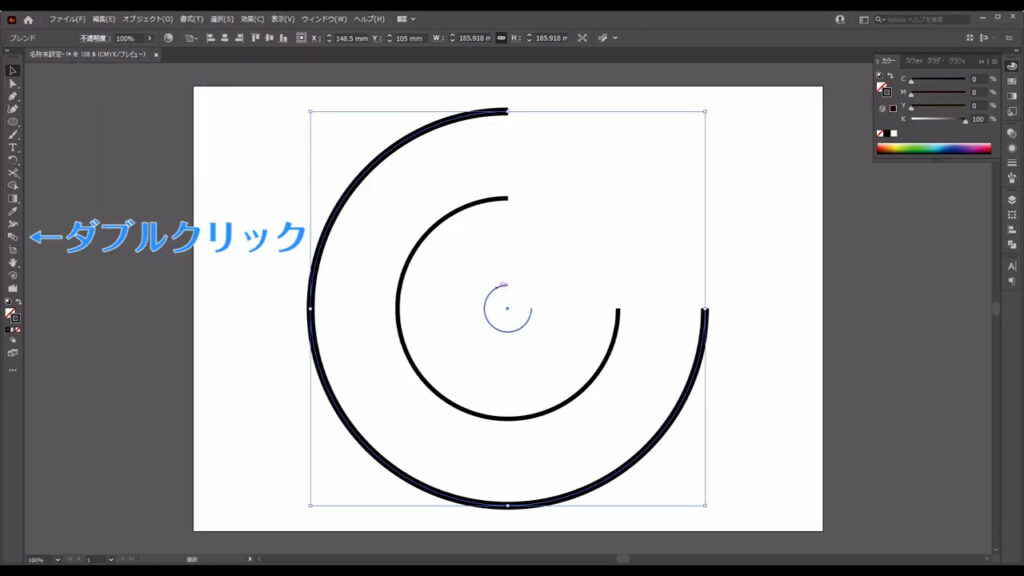
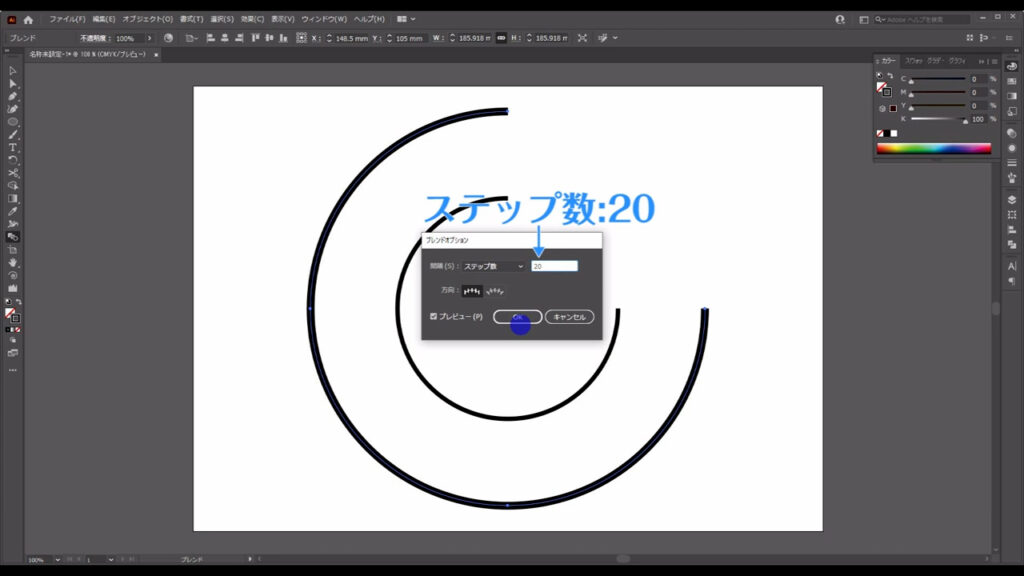
選択ツールでブレンドがかかったオブジェクトを選択した状態でブレンドツール のボタンをダブルクリックすると下図のようなウィンドウが出てきます。
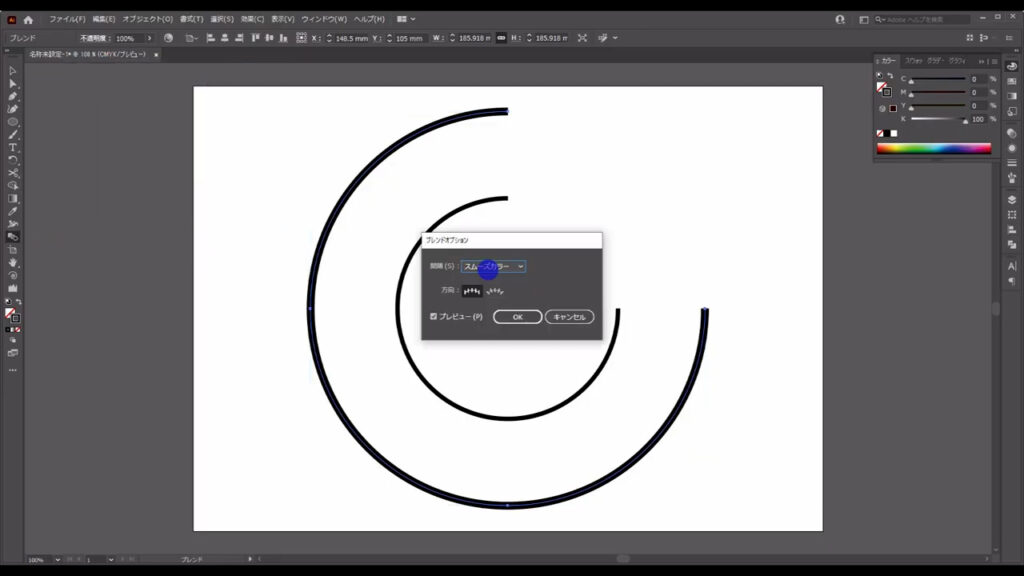
「間隔」というところをステップ数にし、横の数値を「30」に設定してOKを押します。
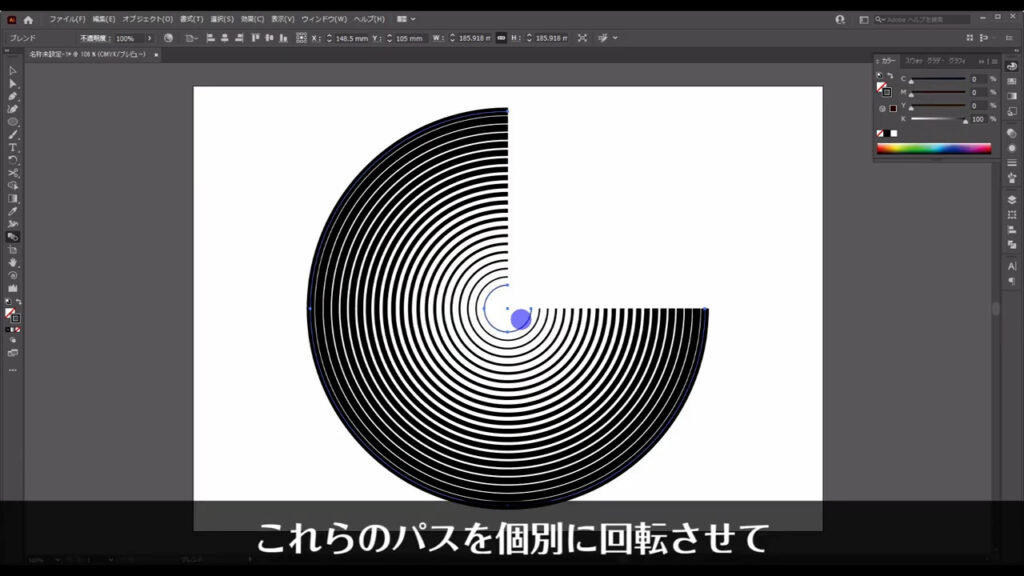
これで2つのパスの間に30本の新たなパスが出てきました。
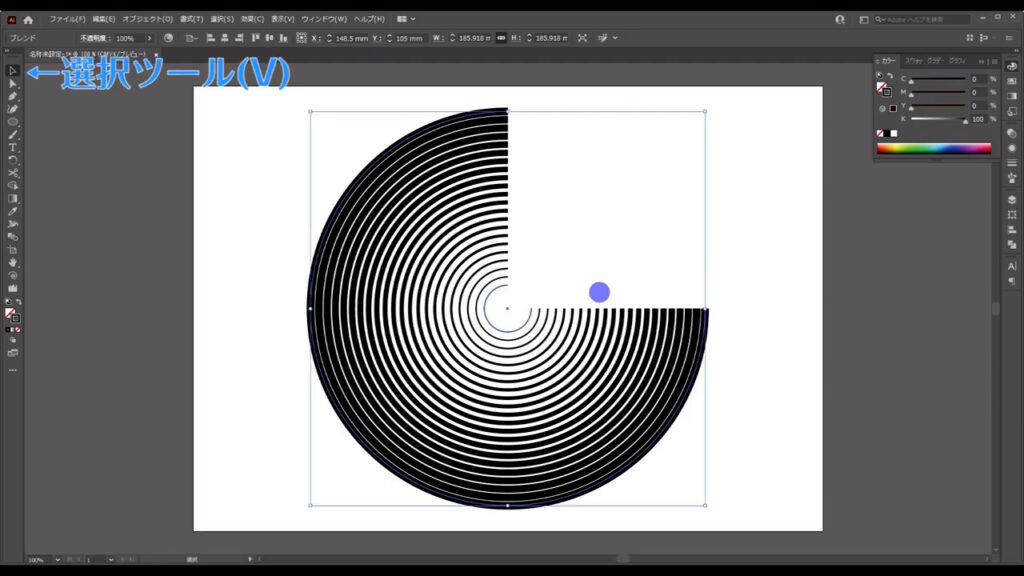
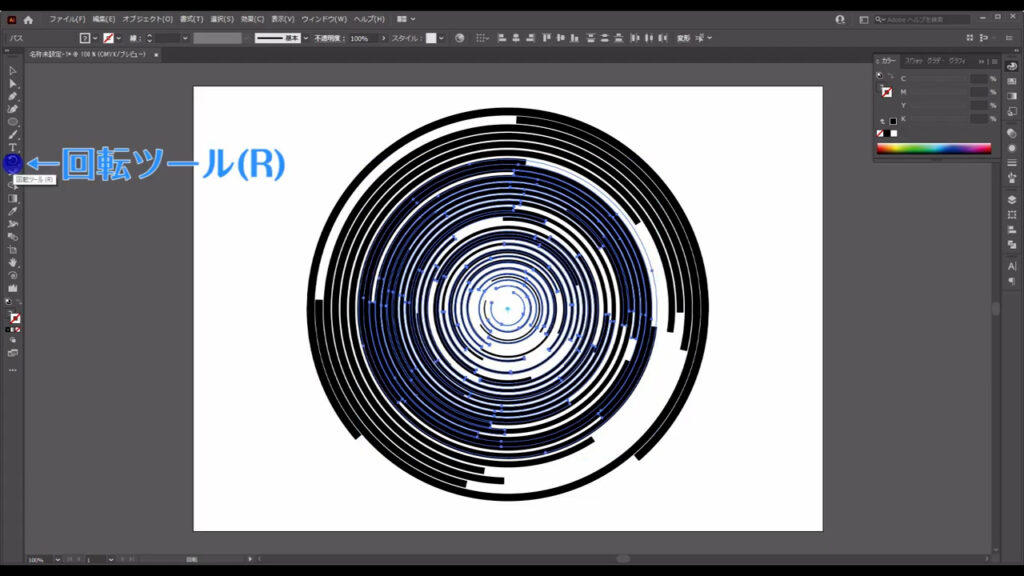
これらのパスを個別に回転させてサイバーな背景を作っていきます。
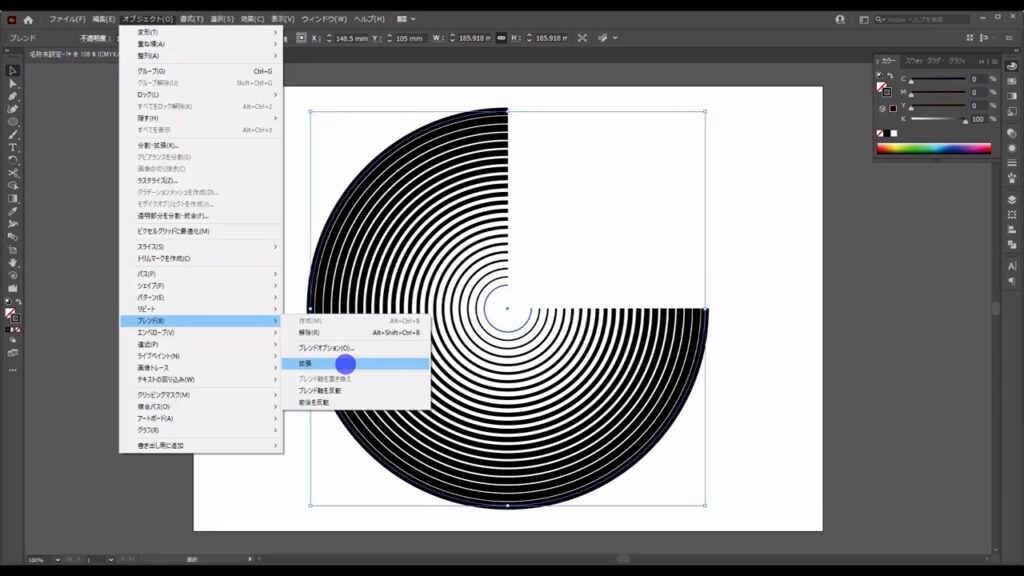
ですが、ブレンドで出てきたパスは、このままでは個別に編集することができません。
「拡張」という操作を実行する必要があります。
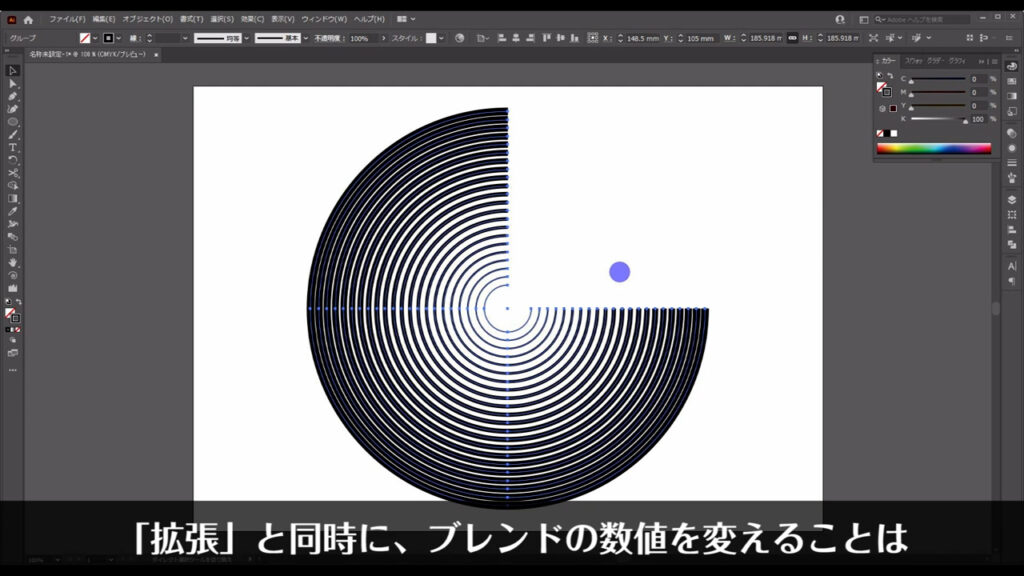
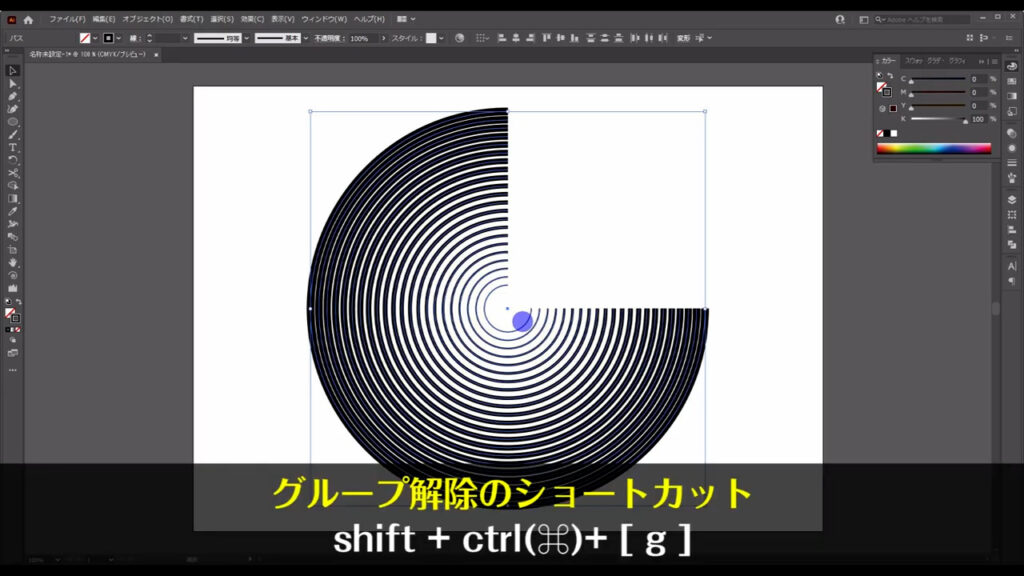
これを選択した状態で下図の手順で「拡張」を押すと、それぞれのパスを編集することができるようになりました。
それと同時にブレンドの数値を変えることはできなくなります。
拡張直後、これらはグループ化されているのでshift + ctrl(⌘) + [ g ]でグループ化を解除しておきます。
それが終わったら、これらをアウトライン化します。
これらのパスを選択した状態で下図の手順で「パスのアウトライン」を実行します。
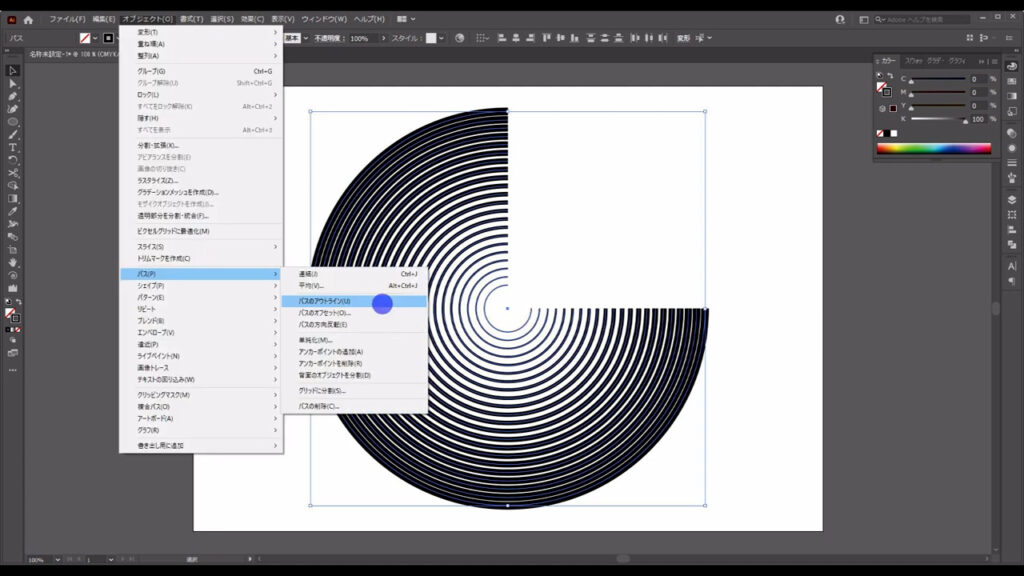
すると、今まで線だったものがこういう形の図形に変換されます。
この「パスのアウトライン」という工程は、後の色の編集で必要になります。
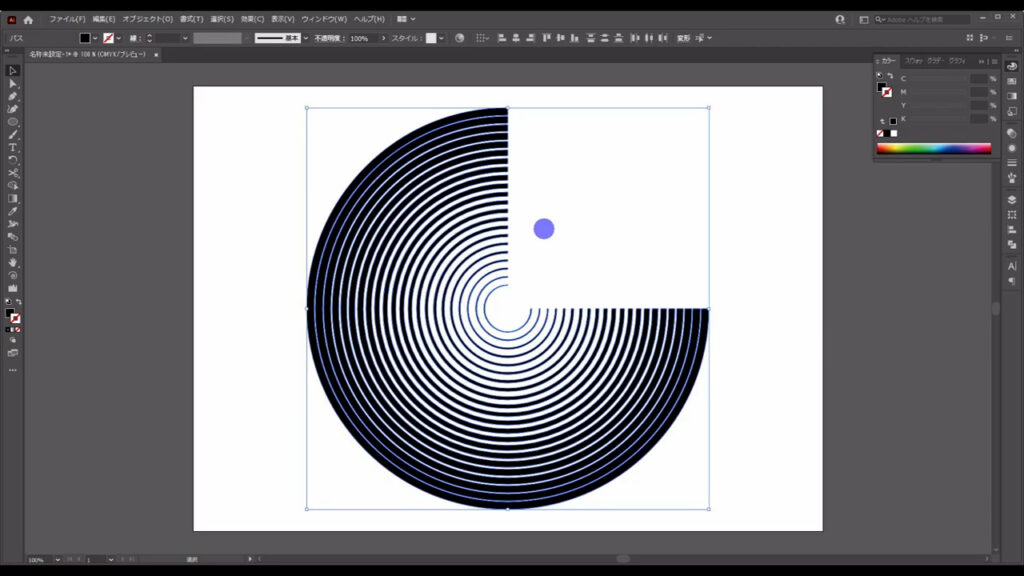

そうしたら、これらのパスを選択した状態で、下図の手順で「個別に変形」へと進みます。
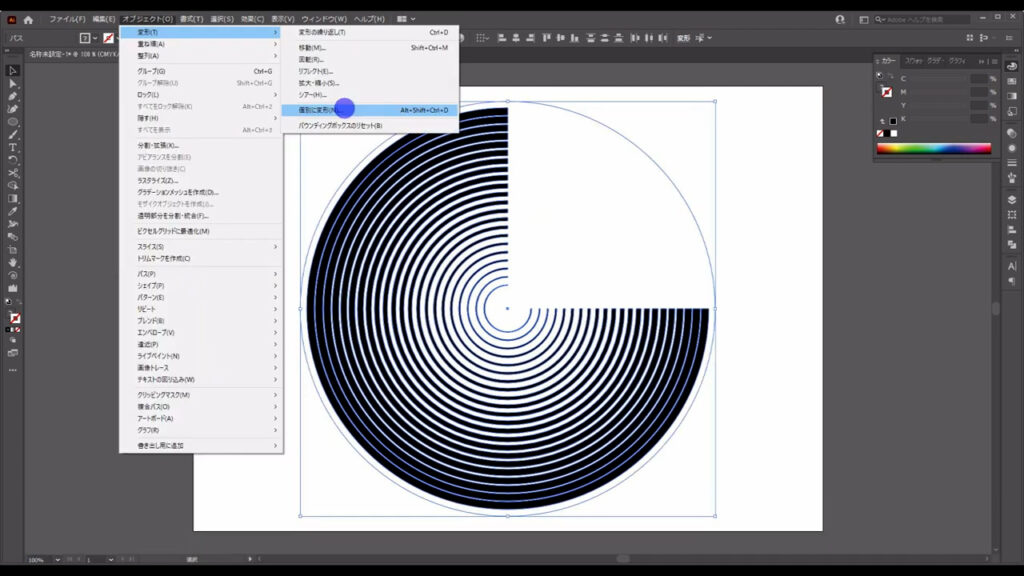
下図のようなウィンドウが出てくるので「プレビュー」と「ランダム」にチェックを入れ、角度のところ(マーキング部分)だけをいじります。
ランダム回転なので数値は何でもOKです。
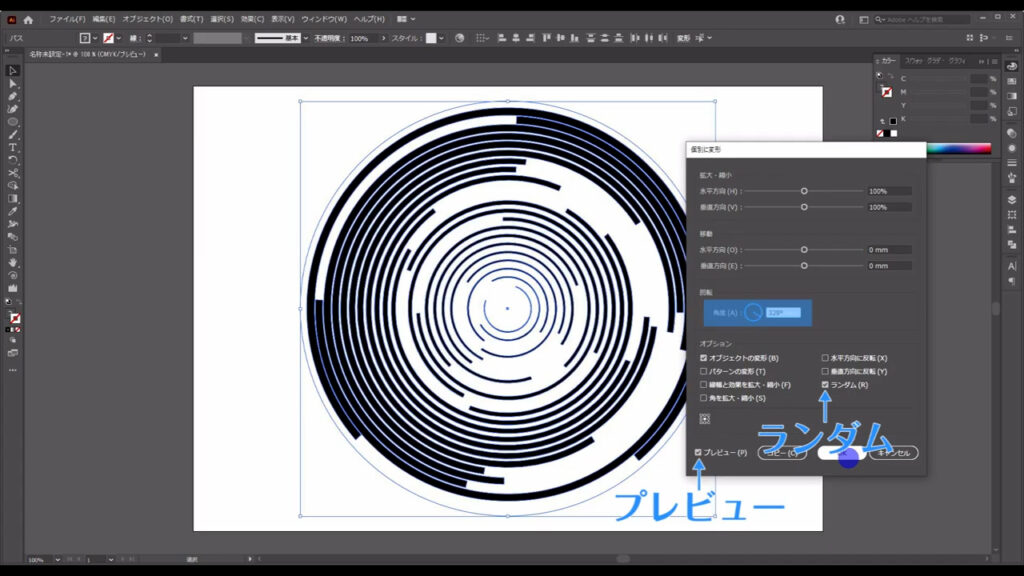
実際の回転具合を見ながら、自分の納得のいくものになったらOKを押します。
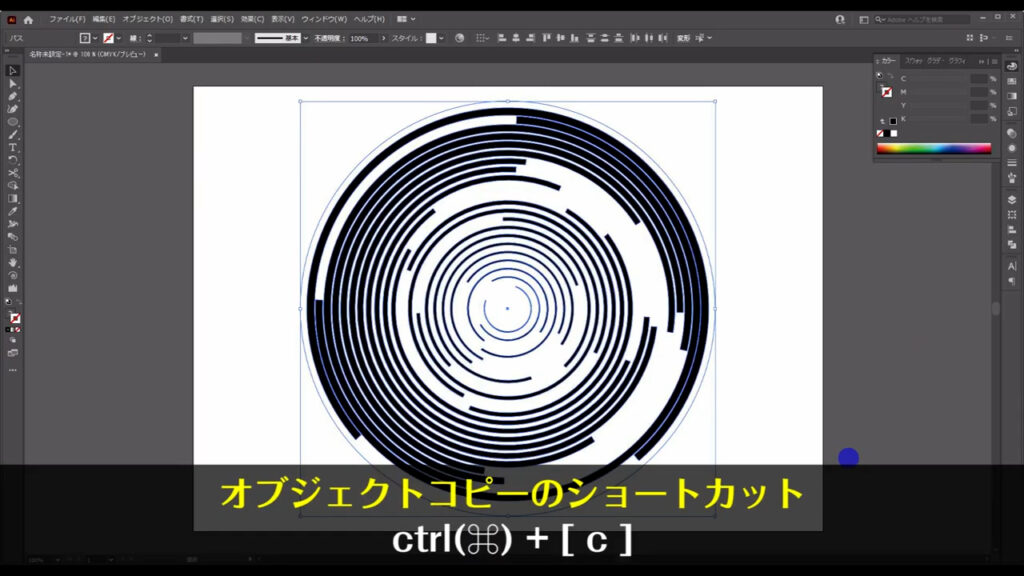
「個別に変形」が終わったら、再度これらを全て選択します。
この時、一番最初に作った塗りと線の設定がなしになっている円も一緒に選択します。

そして、ctrl(⌘) + [ c ]でコピー、さらにctrl(⌘) + [ f ]で真上にペーストします。
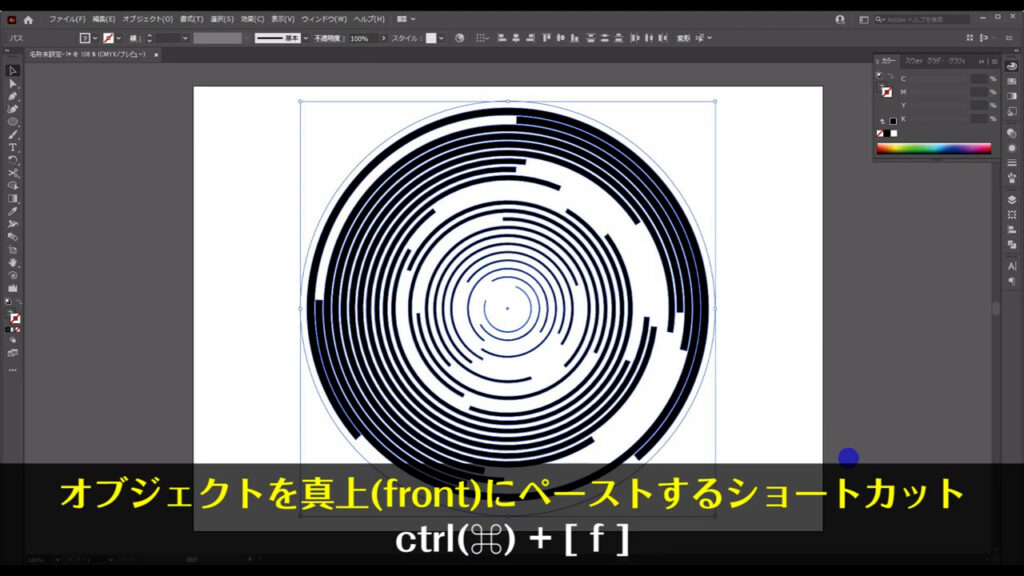
このままの状態で、コピーした方のオブジェクトをshiftとalt(option)を同時押ししながらドラッグで、下図のように小さくします。
ちょっと線が固まりすぎている場合は、選択ツールに切り換えて、バランスよく回転させてみます。
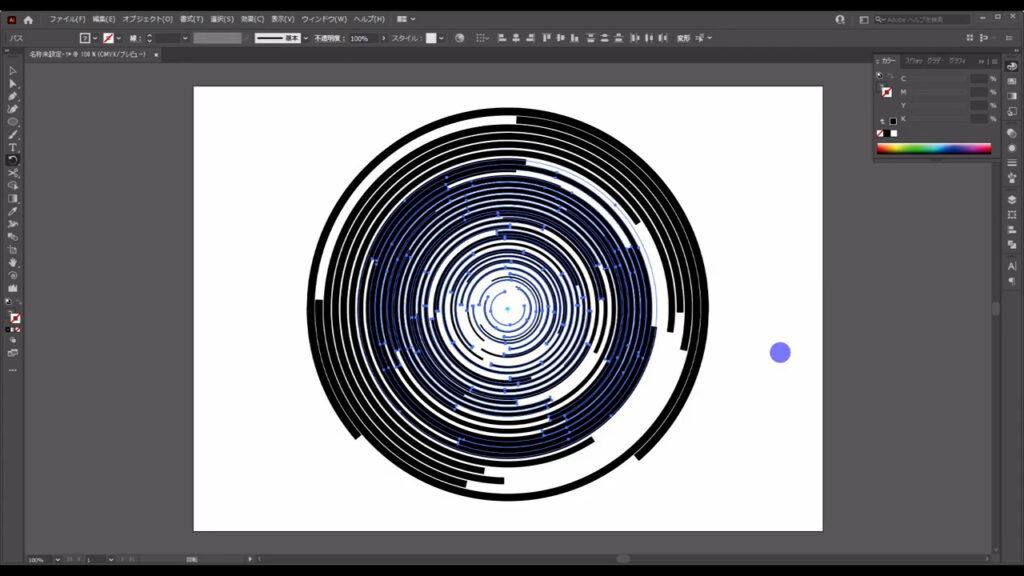
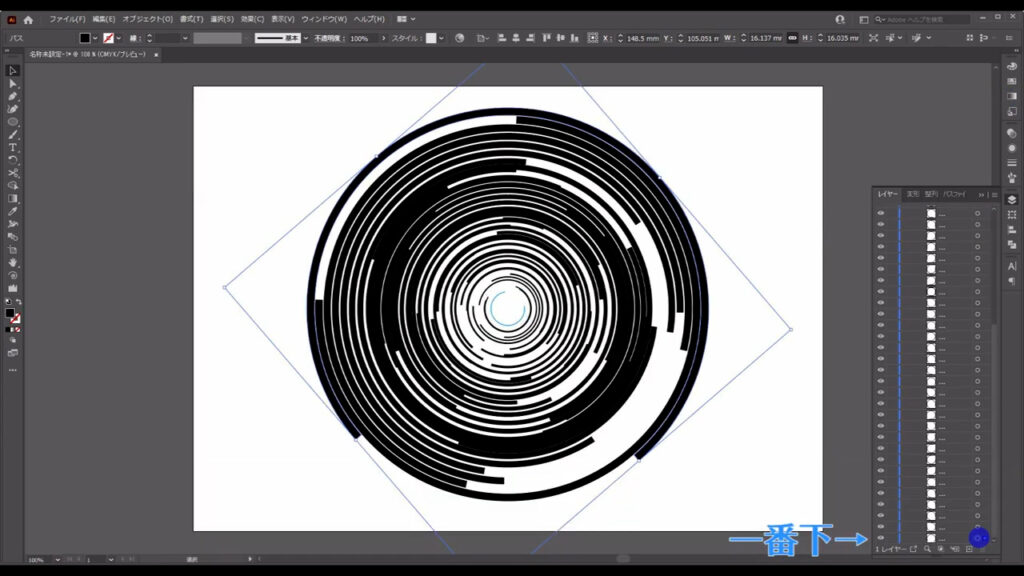
このタイミングで塗りと線の設定がなしになっている外側の円を削除します。
背景の素にランダムで色を着ける
ここまできたら、これらのオブジェクトに色を着けていきます。
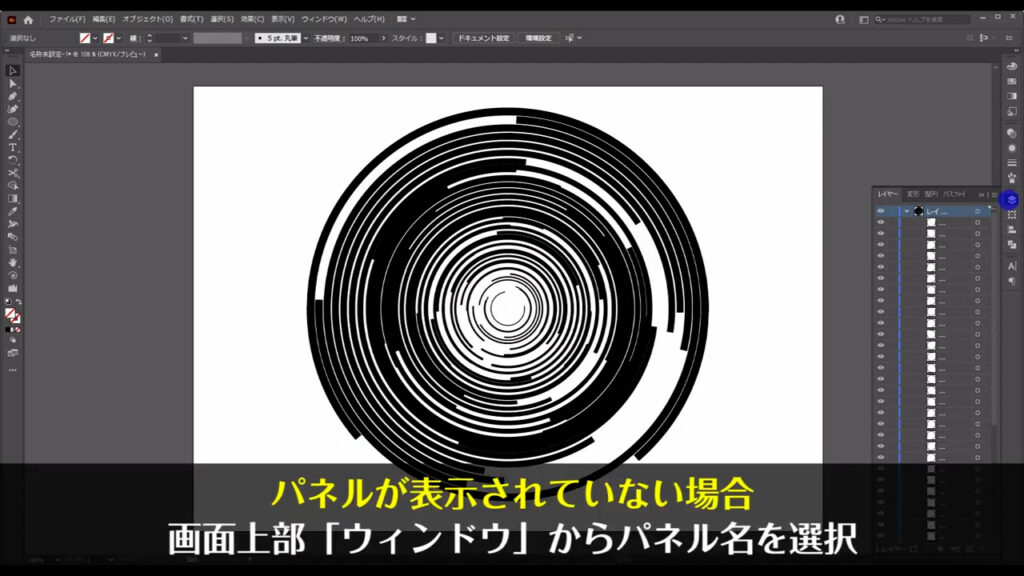
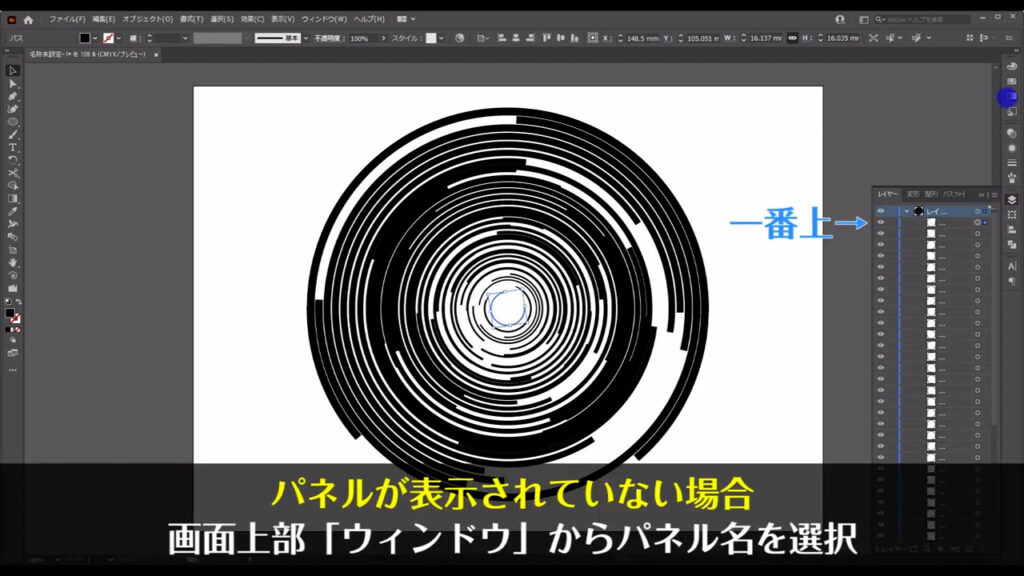
レイヤーパネルを開き、重ね順が一番上に来ているオブジェクトと、一番下に来ているオブジェクトの色をそれぞれ字幕のように設定します。
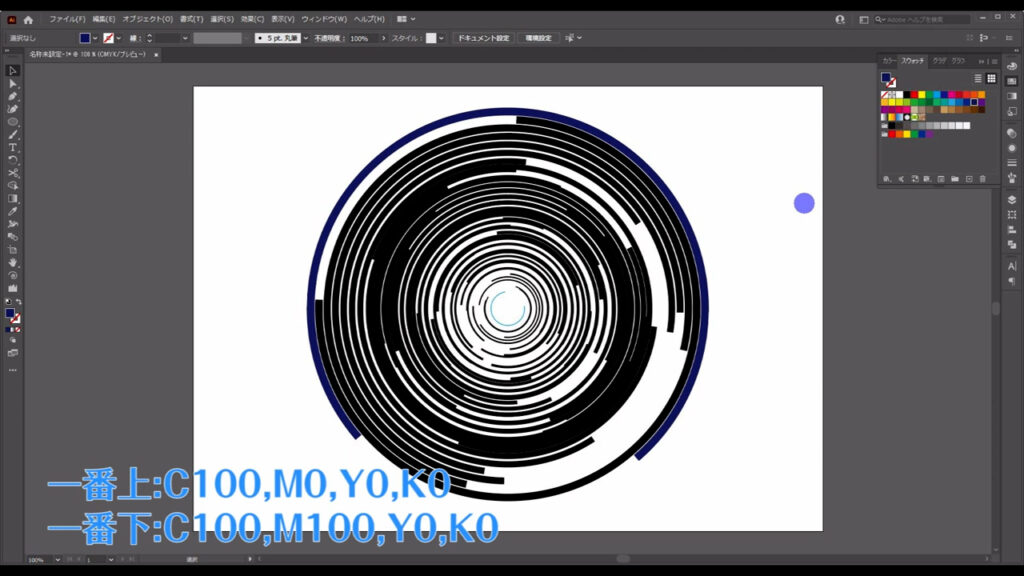
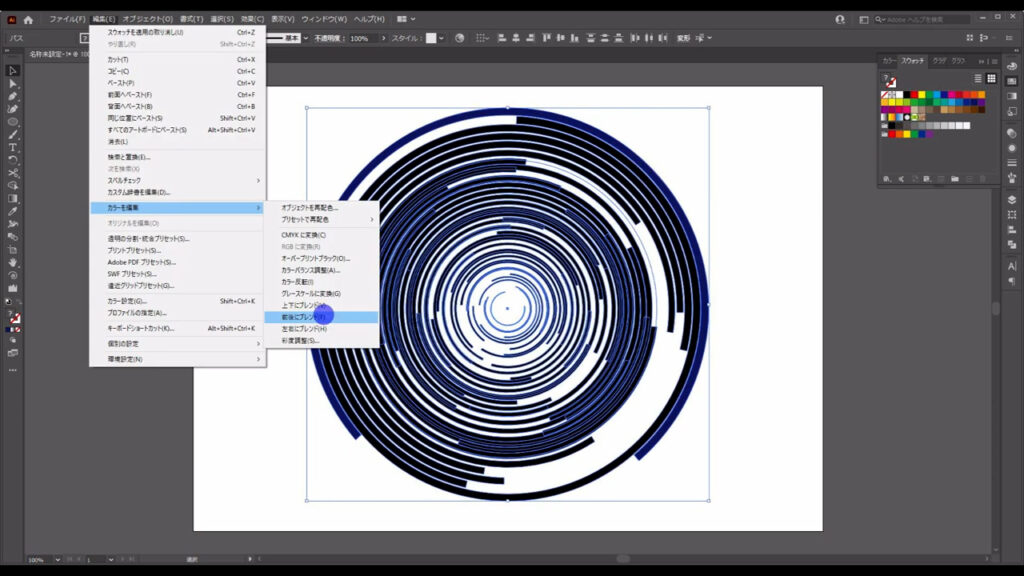
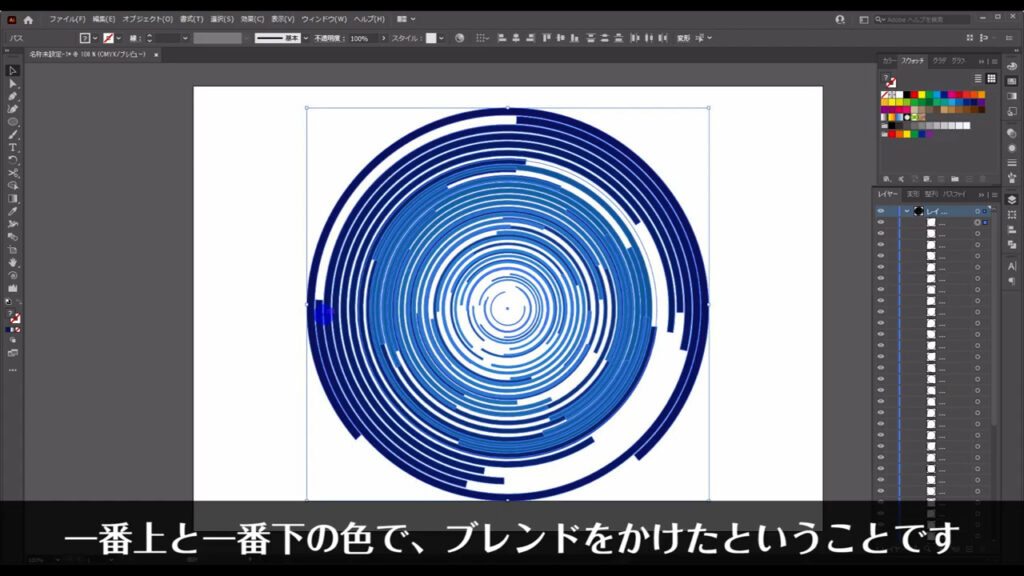
そして、これら全てを選択した状態で、下図の手順で「前後にブレンド」を実行します。
ここでいう「前後」とは先ほど見たレイヤーパネルでのオブジェクトの重ね順のことです。
つまり、一番上と一番下の色の間でブレンドをかけるということです。

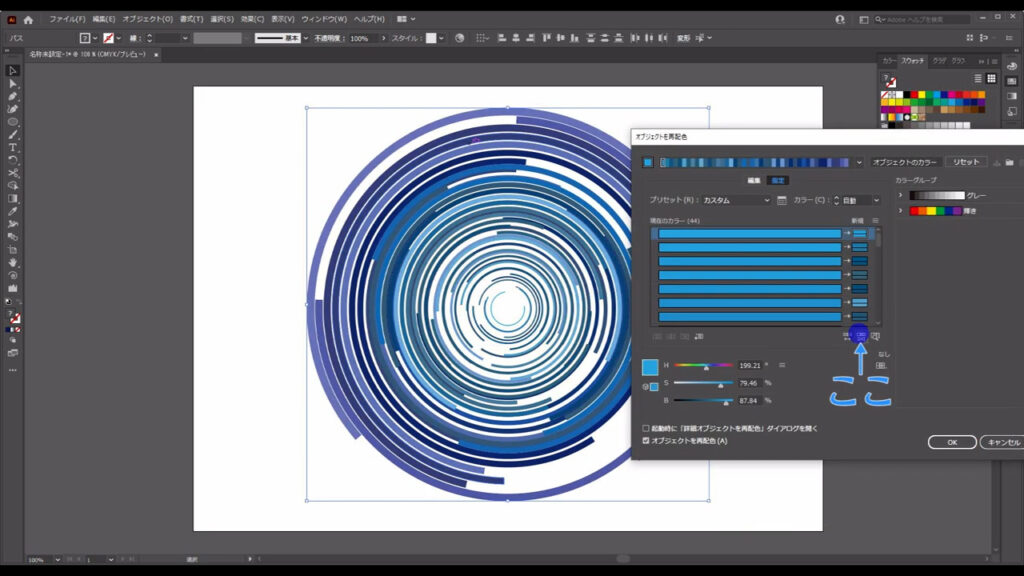
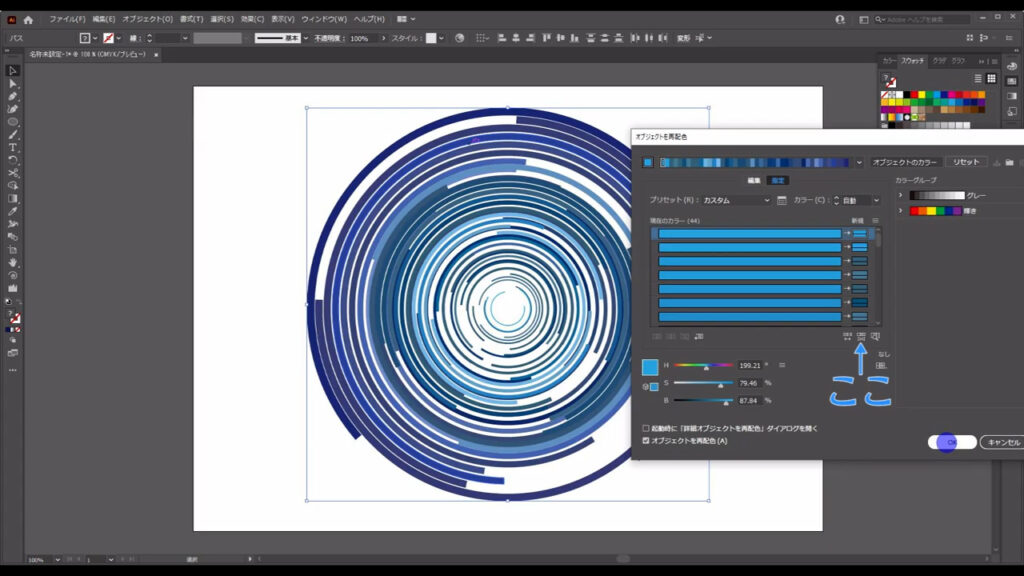
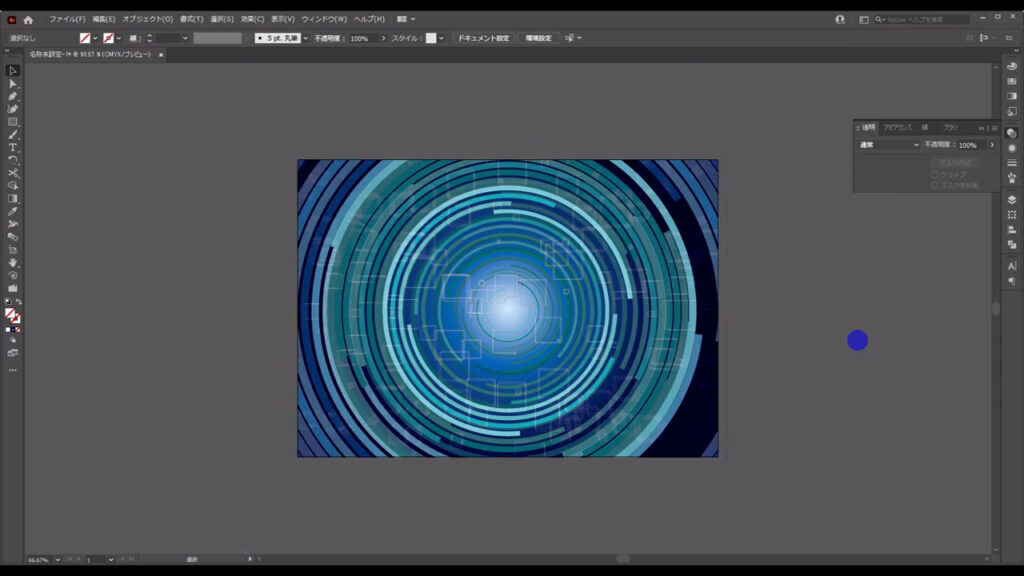
これが終わったら、色の並んでいる順番をランダムにします。
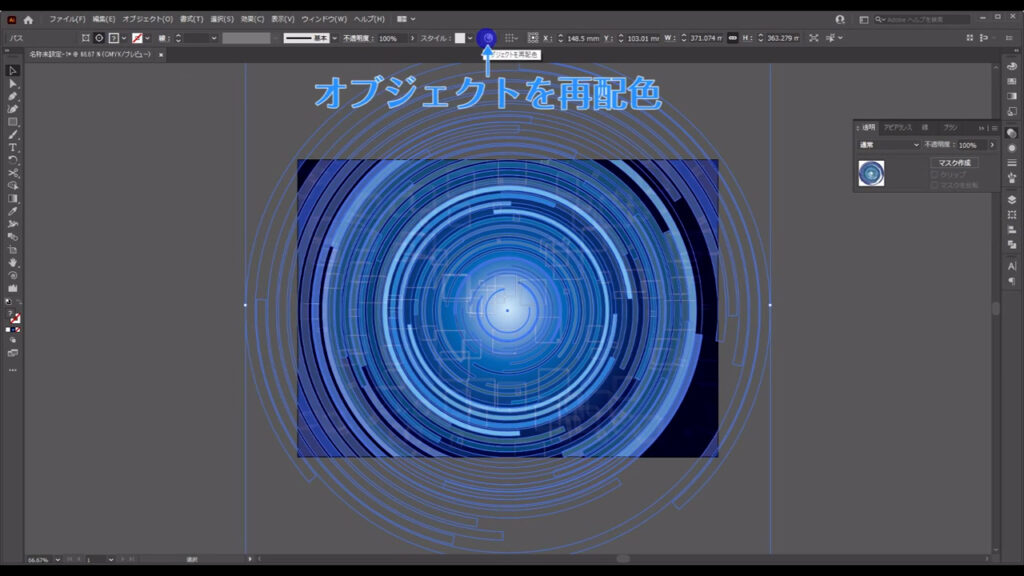
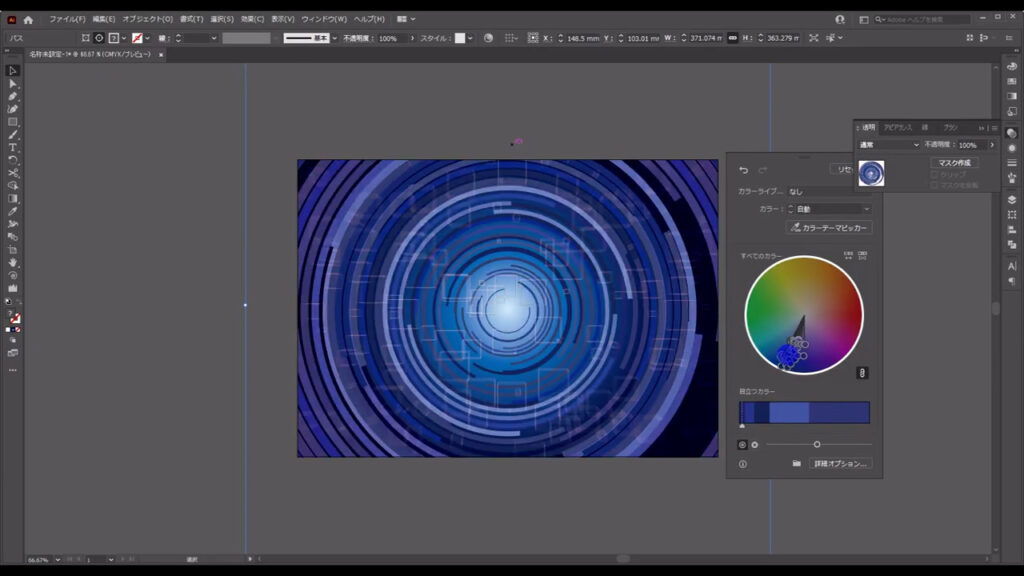
全てを選択した状態で「オブジェクトの再配色」を押します。
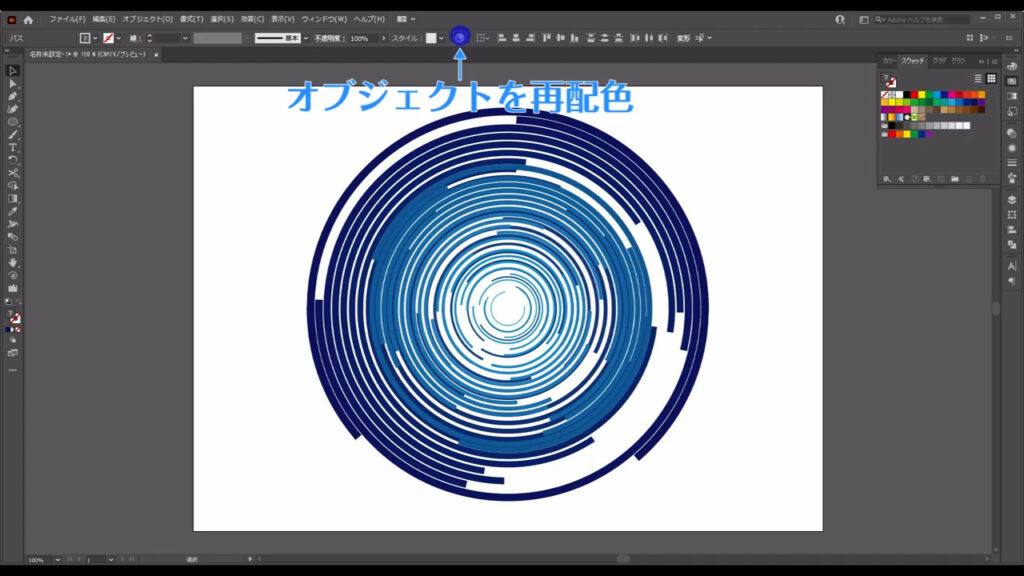
すると、下図のようなパネルが出てくるので「詳細オプション」を押します。
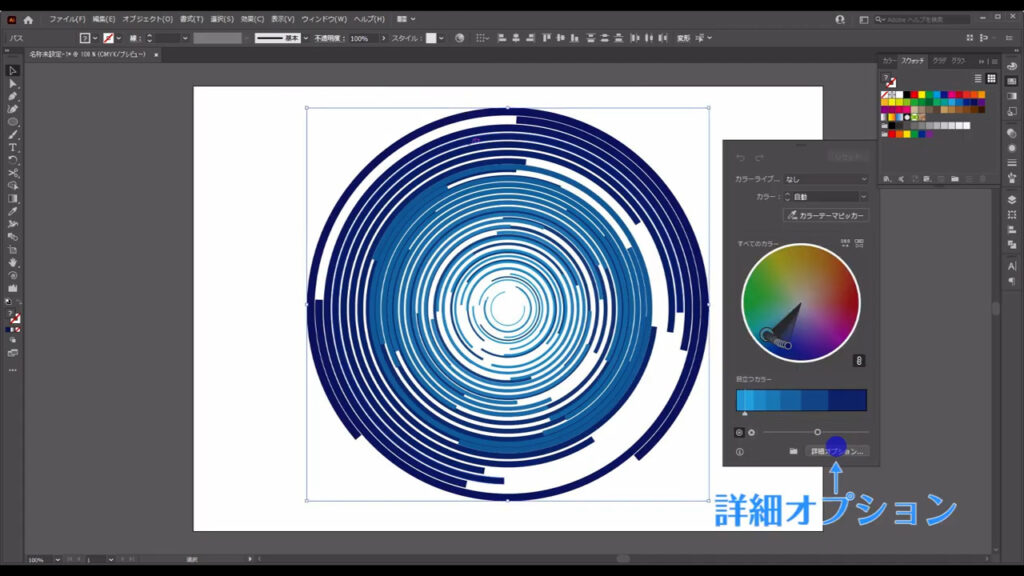
パネルが切り換わるで、ここ(下図参照)を押して、配色をランダムにします。
何回でも押せるので、自分の納得のいくものになったらOKを押します。
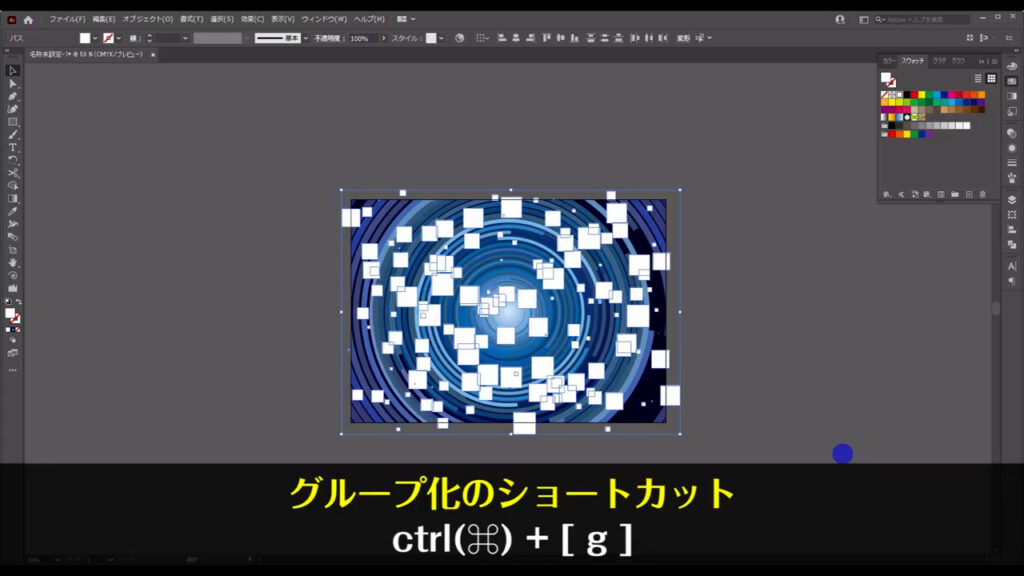
これらはバラけると面倒なので、全選択した状態でctrl(⌘) + [ g ]でグループ化しておきます。
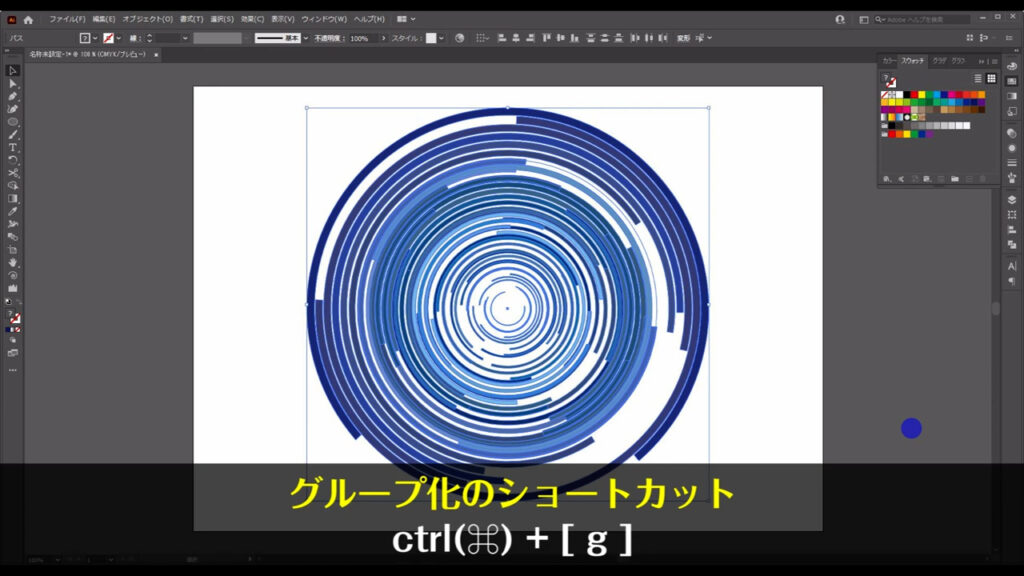
これで8割は完成です。
あとは背景と、ちょっとした装飾を加えれば、出来上がりです。
背面にも色を着けて、装飾も加える
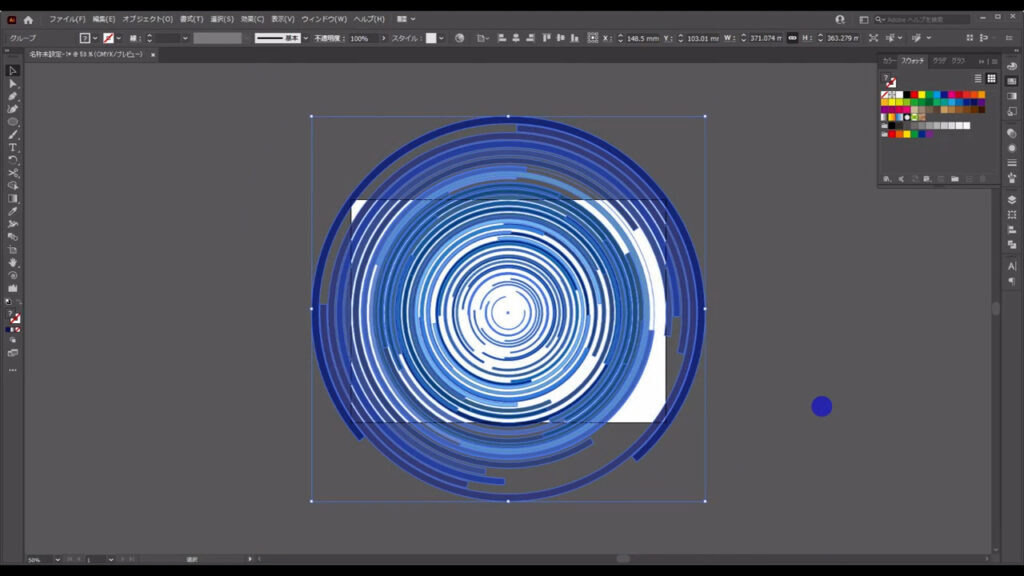
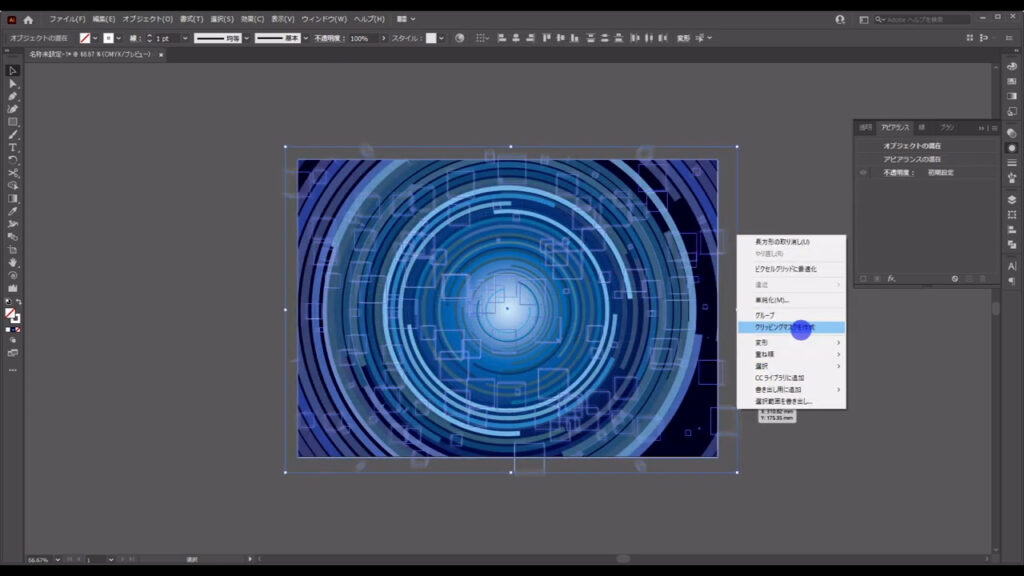
まず、今まで作ったオブジェクトにクリッピングマスクをかけます。
クリッピングマスクとは、前面の図形に合わせて背面のオブジェクトを切り抜く機能です。
実際にやっていきます。
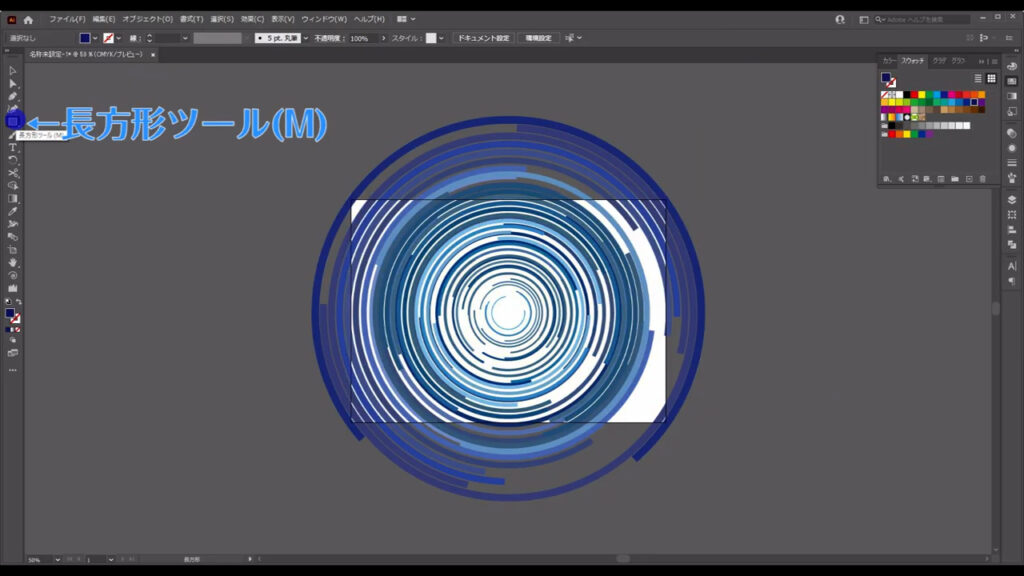
長方形ツールに切り換え、下図のように四角形を配置します。
塗りや線は何でもOKです。
そうしたら、四角形とグループ化したオブジェクトを選択した状態で、右クリックを押して「クリッピングマスクを作成」を実行します。
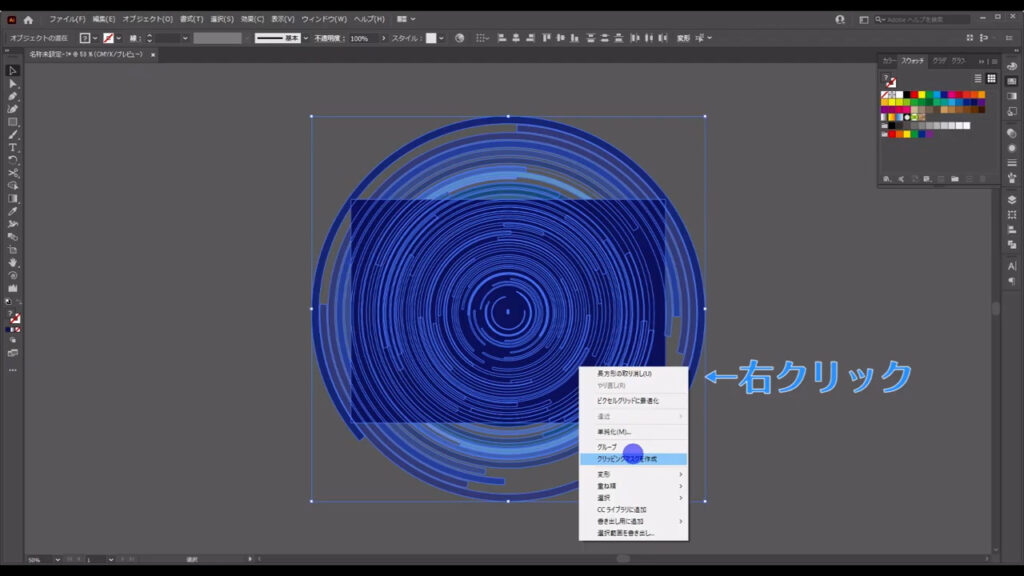
すると、四角形の形に合わせてグループ化したオブジェクトが切り抜かれました。
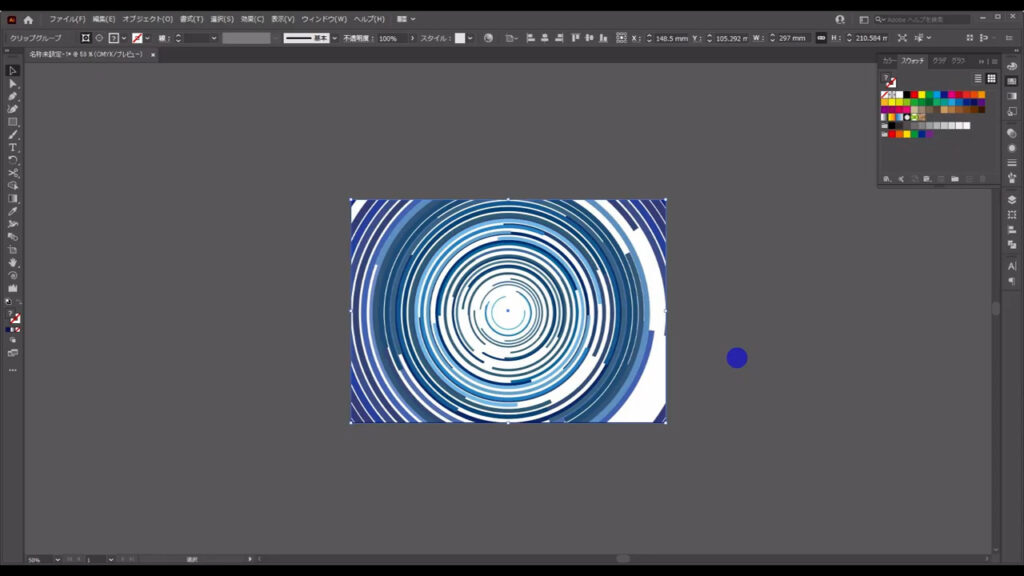
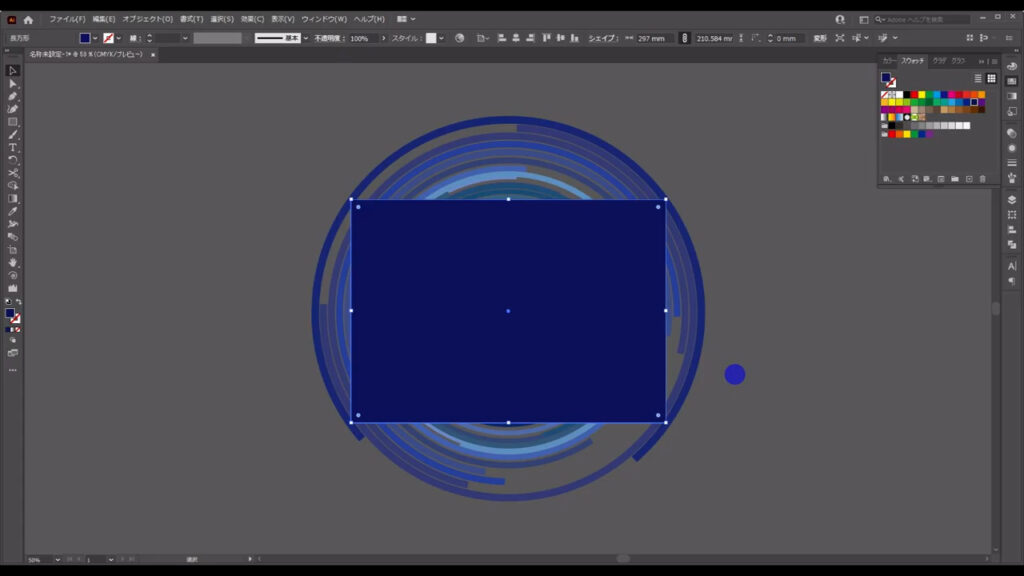
さらに四角形に塗りを追加します。
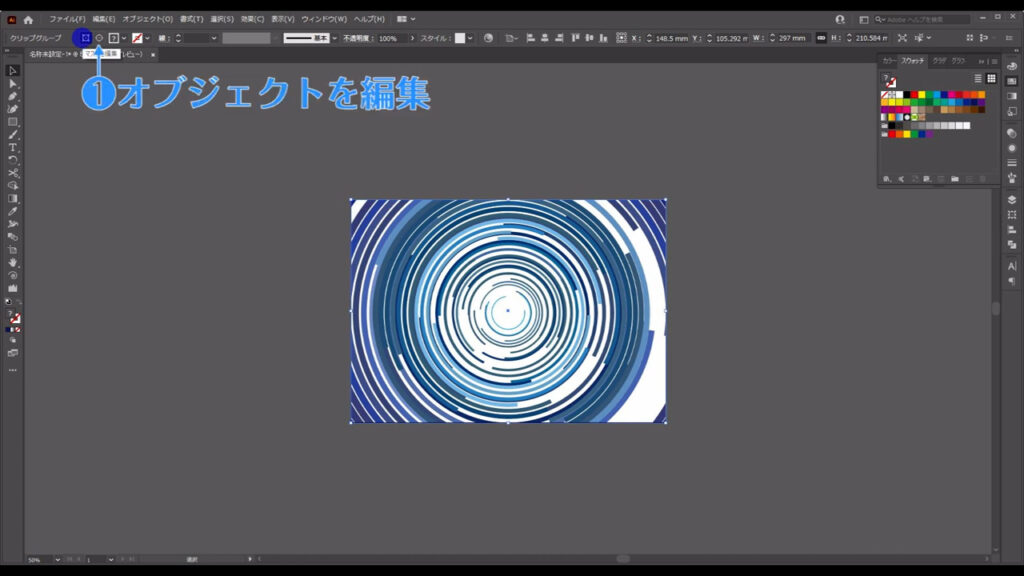
クリッピングマスクがかかっているオブジェクトの編集はここ(下図参照)から行うことができます。
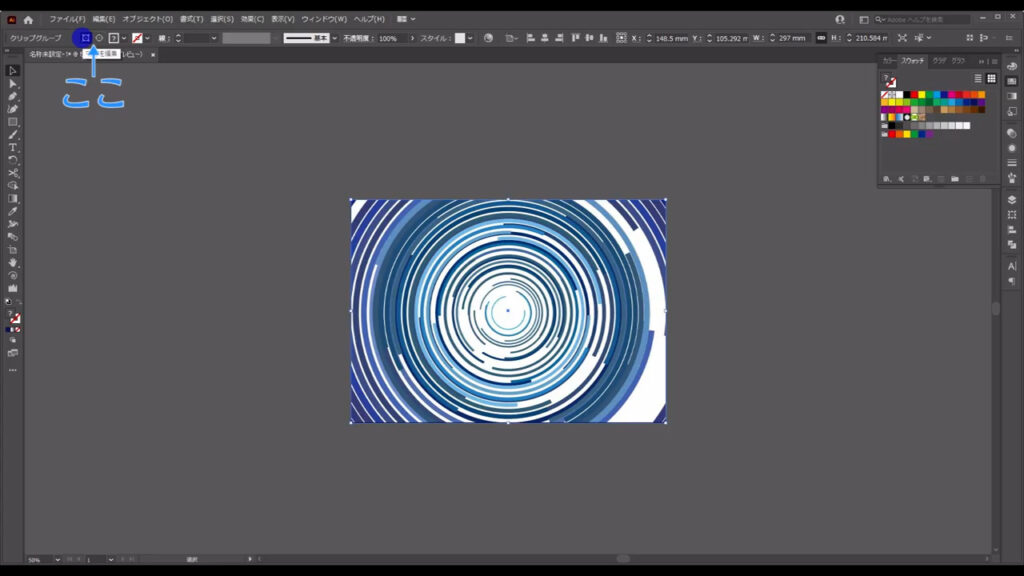
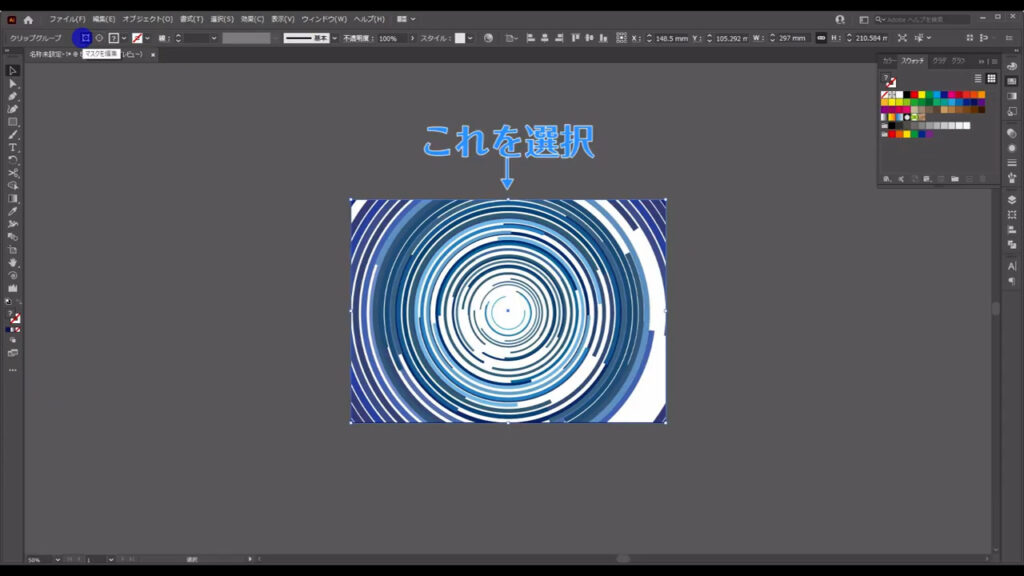
今はマスクをかけている方のオブジェクト、つまり四角形を編集したいので、これを選択した状態で「マスクを編集」を押しますが…
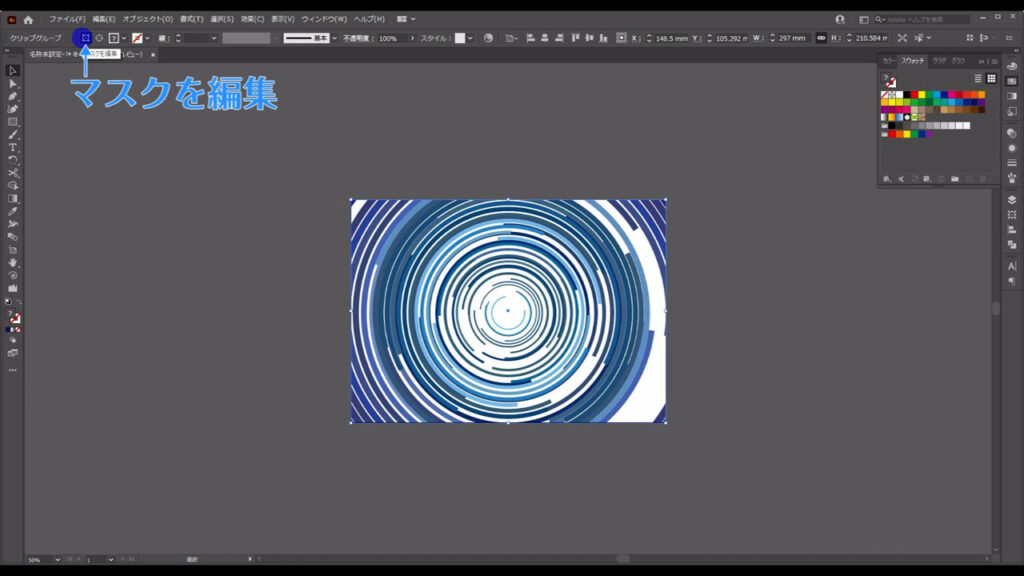
イラレの仕様なのか、一度「オブジェクトを編集」を押してから「マスクを編集」を押さないと、うまく選択することができません。

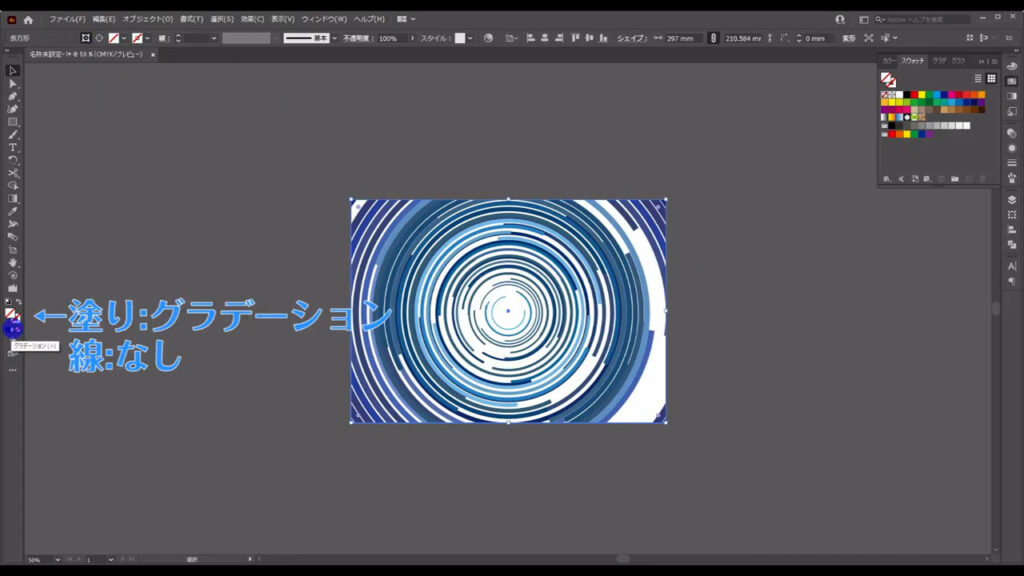
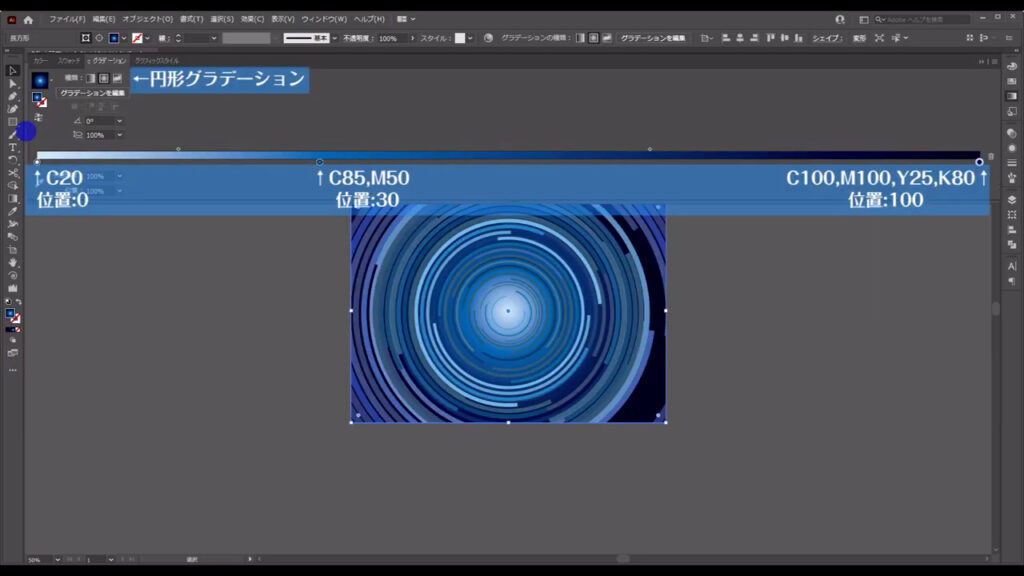
そうしたら、この四角形をグラデーション塗りにします。
グラデーションの種類は円形で、詳細は下図の通りです。
あとはちょっとした装飾を加えて完成です。
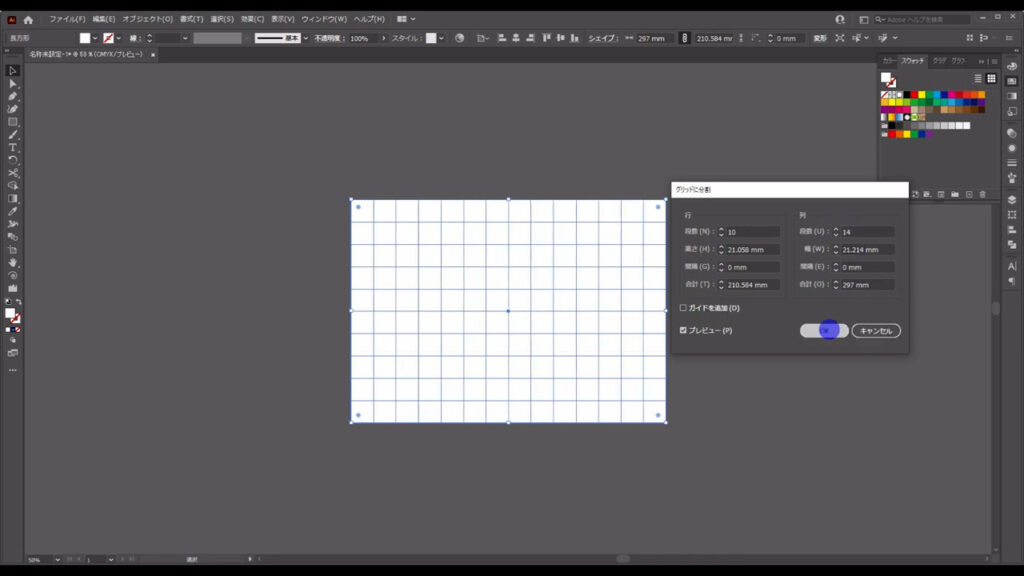
長方形ツールに切り換え、下図のように四角形を配置します。
塗りは白で線はなしです。
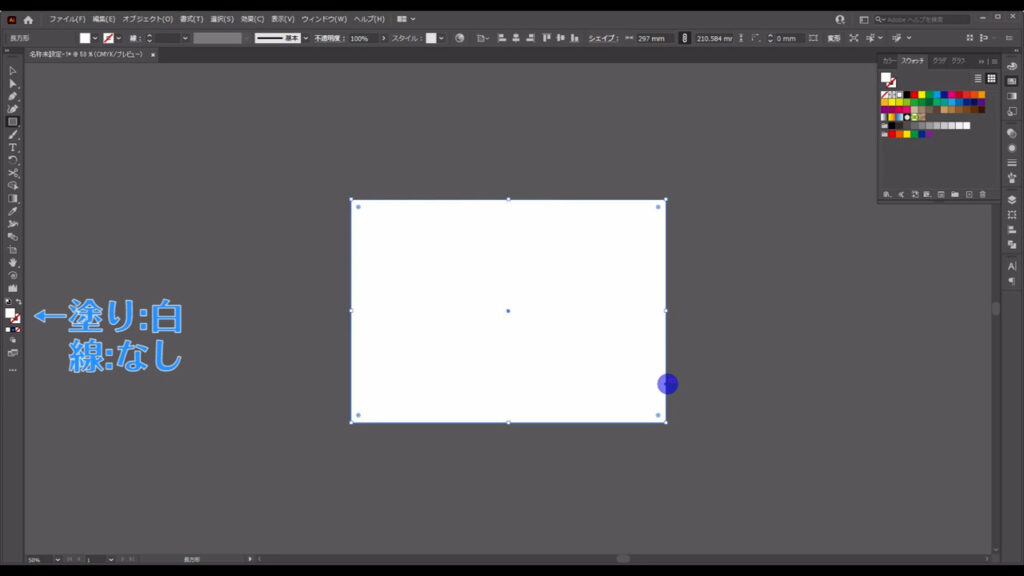
配置し終わったら、この四角形を選択した状態で下図の手順で「グリッドに分割」へと進んでいきます。
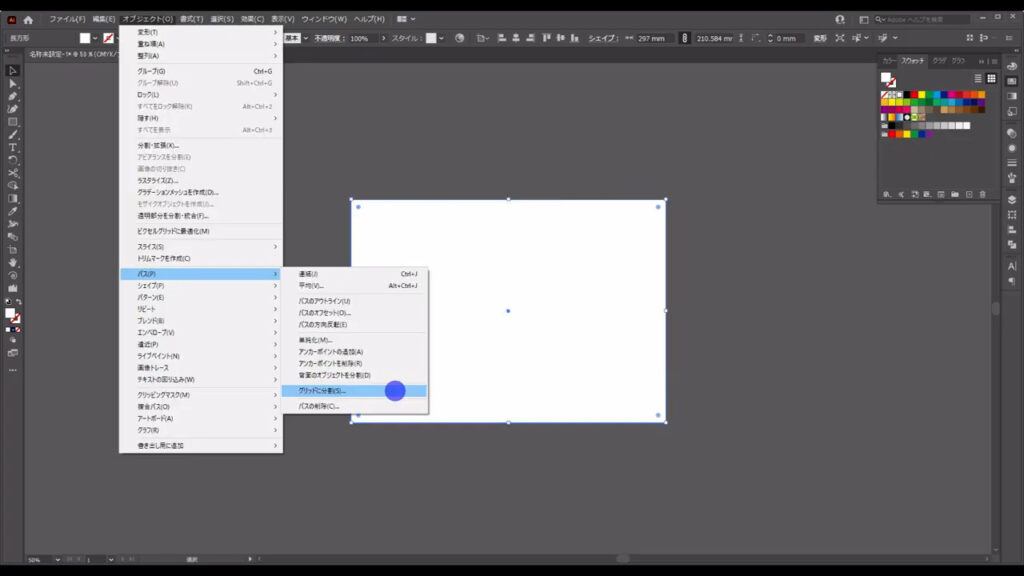
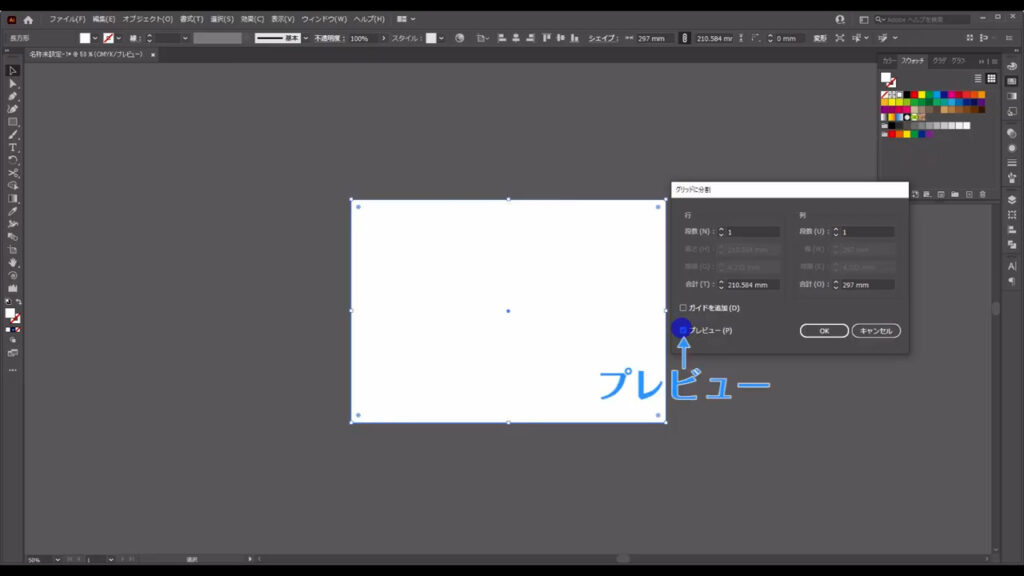
すると、下図のようなウィンドウが出てくるので「プレビュー」にチェックを入れ、大体でいいので、四角形が正方形に見える数値に設定してOKを押します。
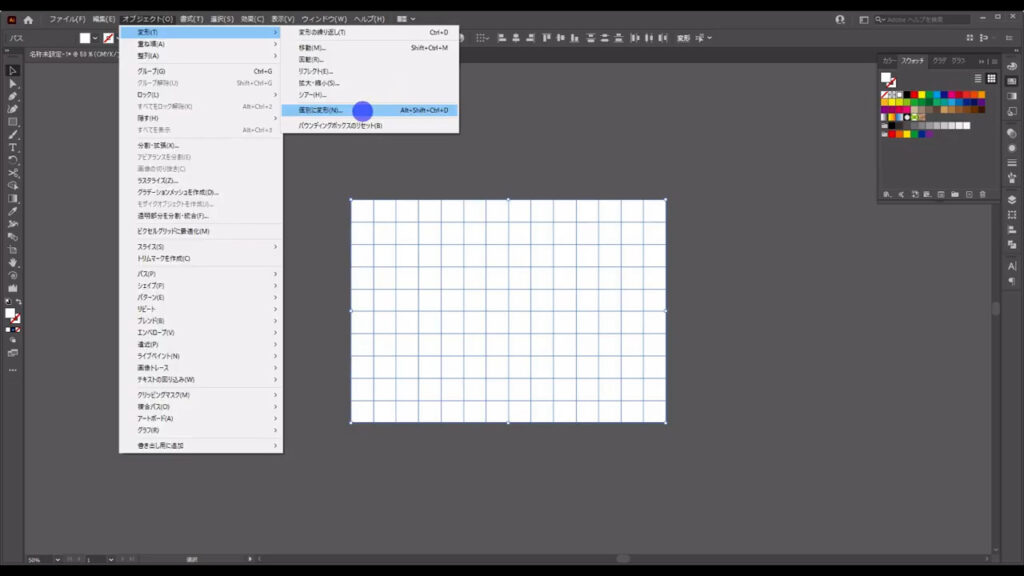
そして、このままの状態で画面の手順で「個別に変形」へと進んでいきます。
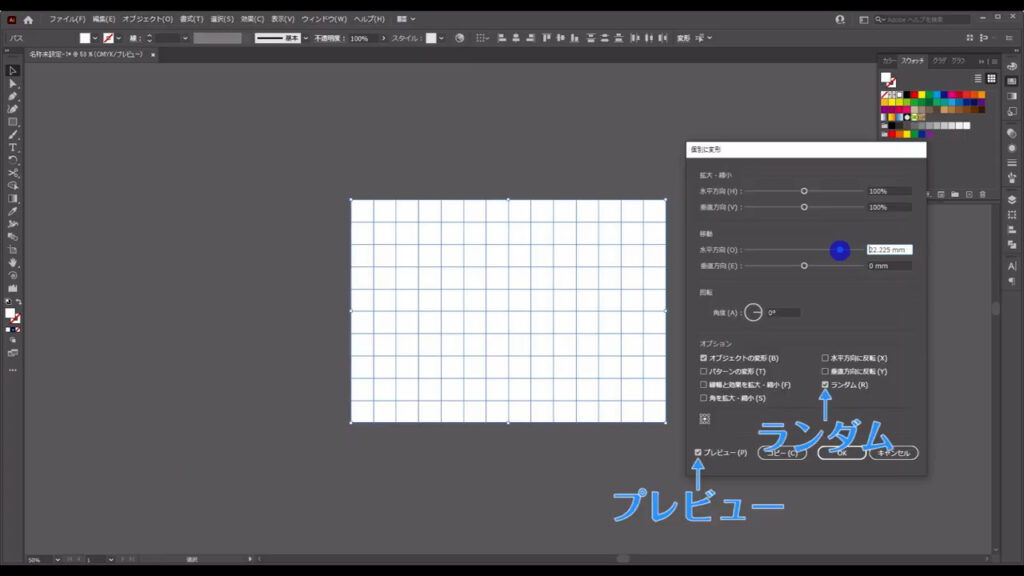
下図のようなウィンドウが出てくるので「プレビュー」と「ランダム」にチェックを入れ、マーキング部分のように設定してOKを押します。
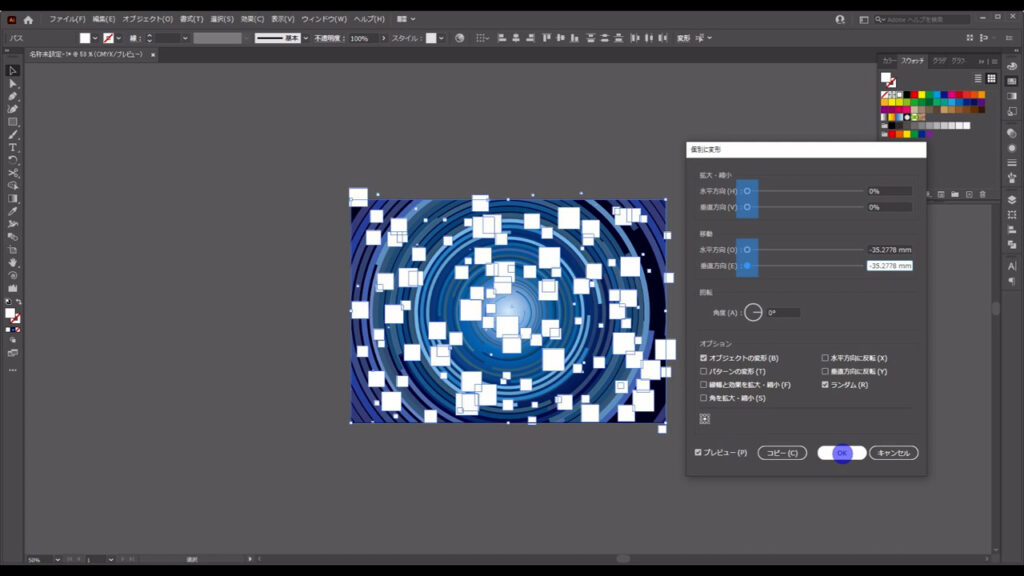
これらもバラけると面倒なので、ctrl(⌘) + [ g ]でグループ化しておきます。
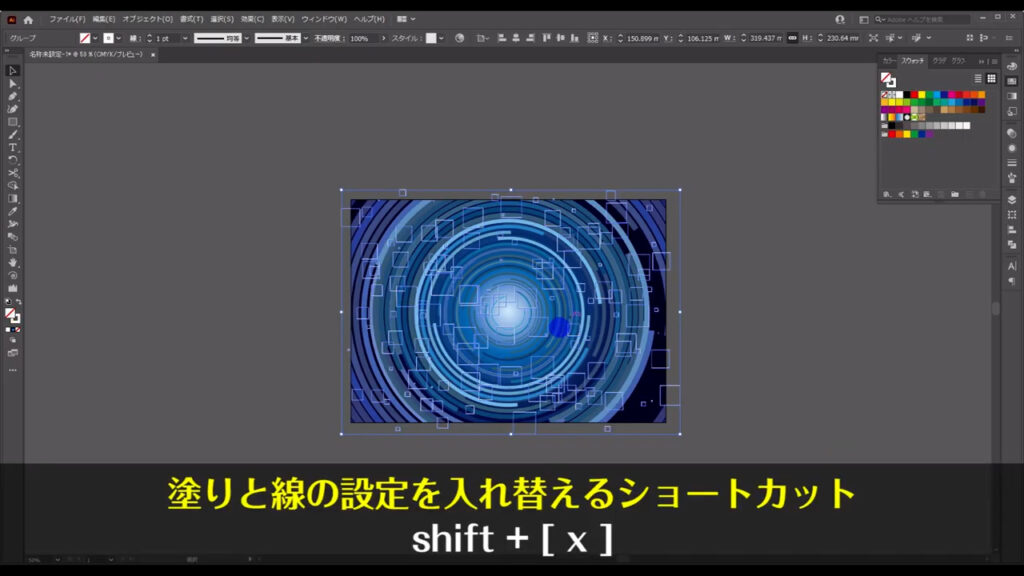
そして、これらの四角形の塗りと線の設定をチェンジします。
ショートカットはshift + [ x ]です。
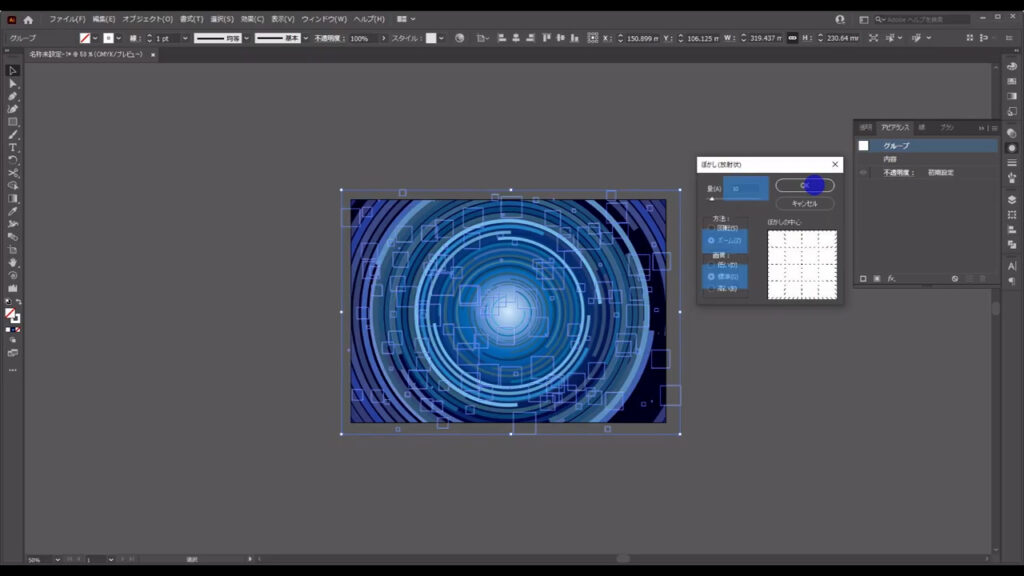
このままの状態でアピアランスパネルを開き「fx」から「ぼかし」「ぼかし(放射状)」へと進んでいきます。
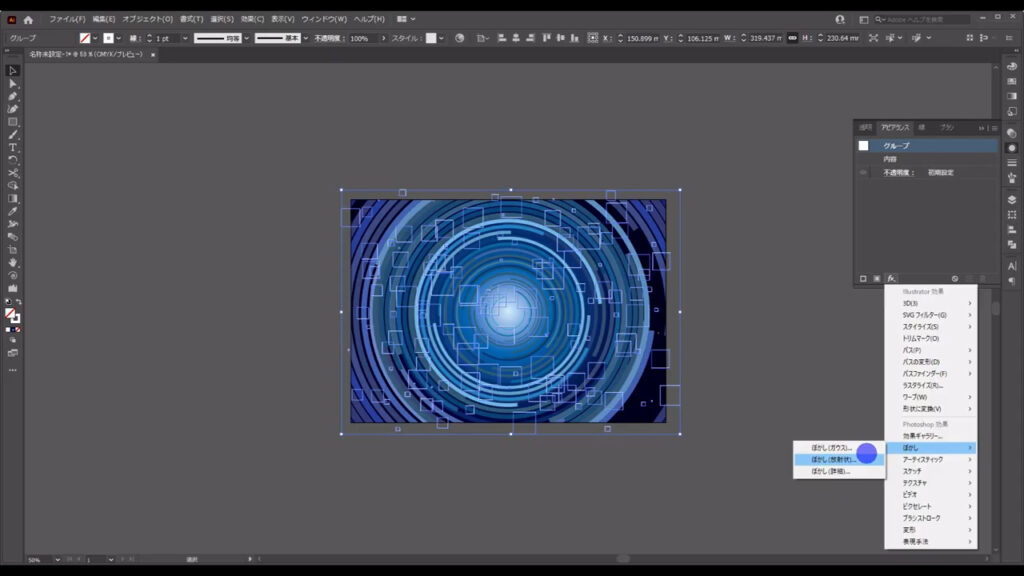
下図のようなウィンドウが開くので、マーキング部分のように設定してOKを押します。
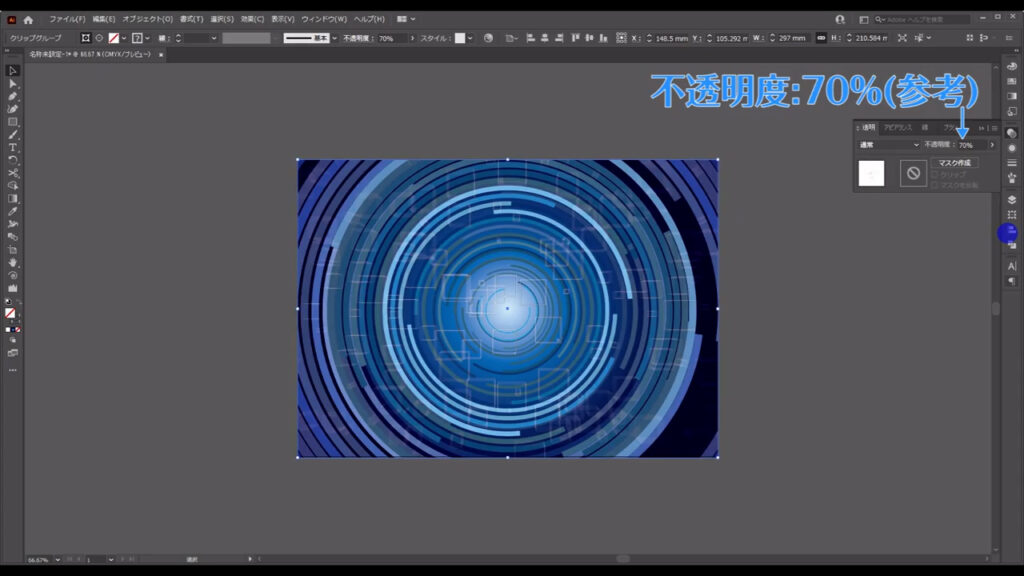
最後に、これにもクリッピングマスクをかけて、透明パネルから不透明度を好みの数値に設定すれば、サイバー背景の完成です。
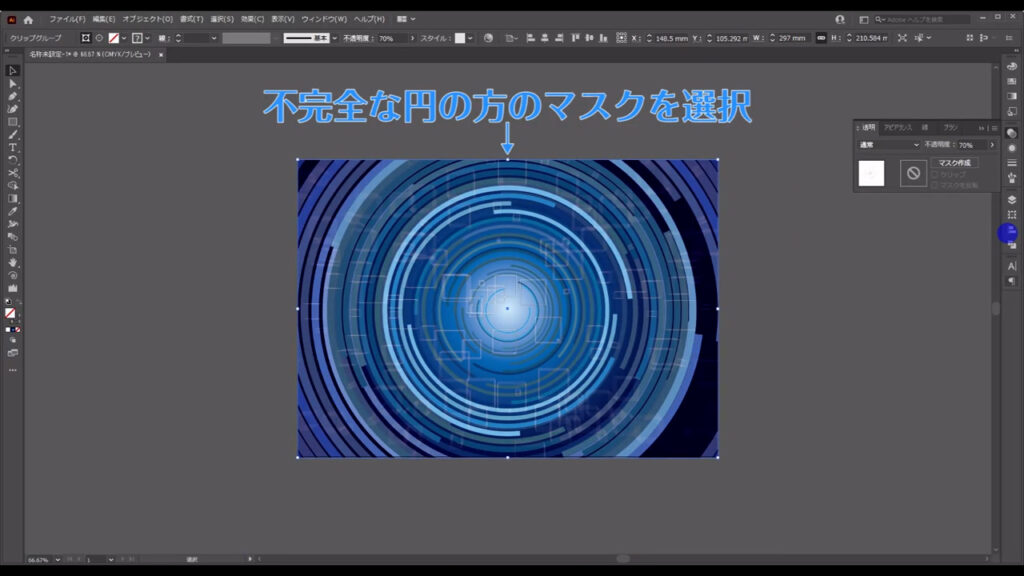
因みに、不完全な円の方は、色をまとめて微調整できます。
不完全な円にかかっているマスクを選択した状態で「オブジェクトを編集」を押し、さらに「オブジェクトを再配色」を押すと下図のウィンドウが出てくるので、そこにあるハンドルを移動させれば、微調整が可能です。
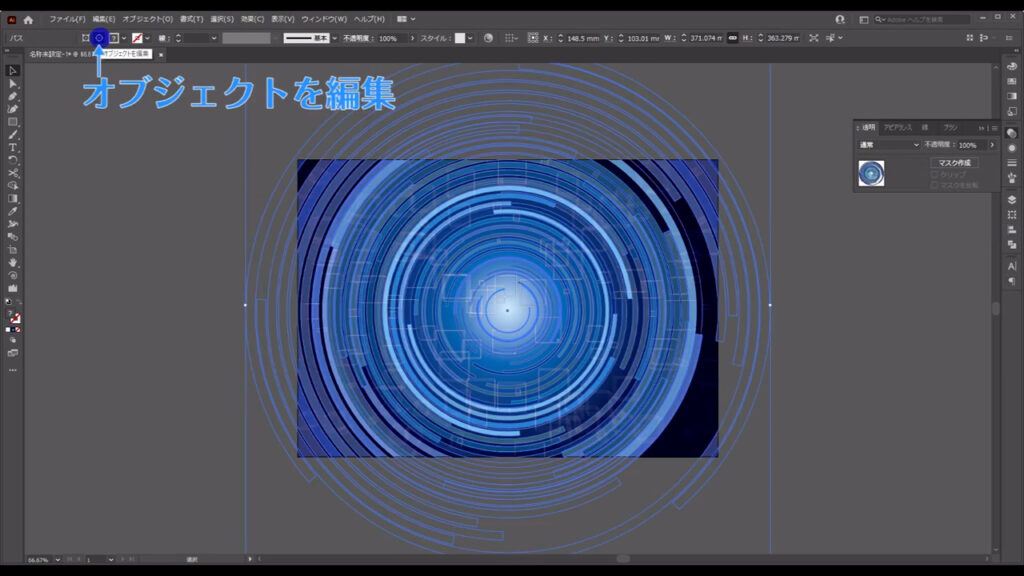
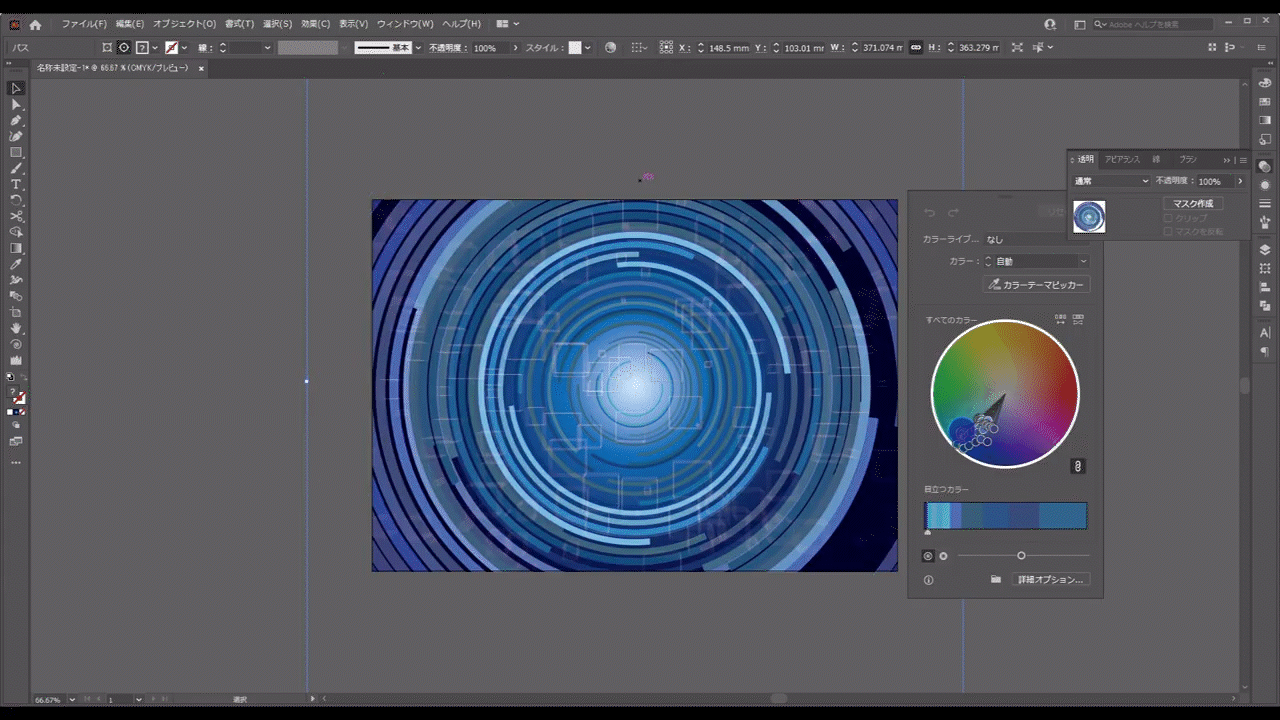
適当なところを左クリックすれば、このパネルは消えます。
最後までお読みいただき、ありがとうございます。
無料で完成素材をダウンロード↓
サイバー背景イラスト – No: 22036753/無料イラストなら「イラストAC」をイラストACでチェック!


コメント